Easy Hammered Wire Earring Tutorial

This week I am guest posting on Cousin Corporation's blog about what my Jewelry Making Passion is.  I thought I would also share the project here! Check out my project and then be sure to hop over to the Cousin Corp blog to see what all of the other ambassador's are passionate about!

Hello! Rebecca from My Girlish Whims here to talk about my jewelry making passion! I've been making jewelry ever since I was a kid and so jewelry making in general is truly a passion of mine. It's what I do to have fun and relax in my spare time.  I enjoy using a variety of technqiues in my jewelry making but a current favorite is using an anvil and chasing hammer to hammer and texture wire. This is a really easy technique that can easily make your jewelry pieces look very professional!

I've used this technique in the past to share the following two projects on my blog:


To show you how to use this technique today I'm going to share a tutorial on how to make these cute earrings:

To follow along and make your own pair of earrings you will need: 

Supplies: 
16 gauge aluminum wire, cousin glass round beads, head pins, jump rings, earring wires, chasing hammer, anvil, metal hole punch pliers, round nose pliers, wire cutters and needle nose pliers


Steps:
Using wire cutters, cut two pieces of wire about 2 inches in length

Place the wire on an anvil.  Hold one end with your finger and use the large end of a chasing hammer to hammer the other end flat

Use the hammer to texture the entire wire piece like so:

You can see the difference that hammering makes in the wire piece; the chasing hammer makes the wire piece flat and hard and easy to use in jewelry pieces!


Repeat this process for the other piece of wire and then use your metal hole punch pliers to punch a hole in the bottom of each wire piece.

Next up is to prepare the beaded dangles for the earrings. String a bunch of round beads onto head pins.


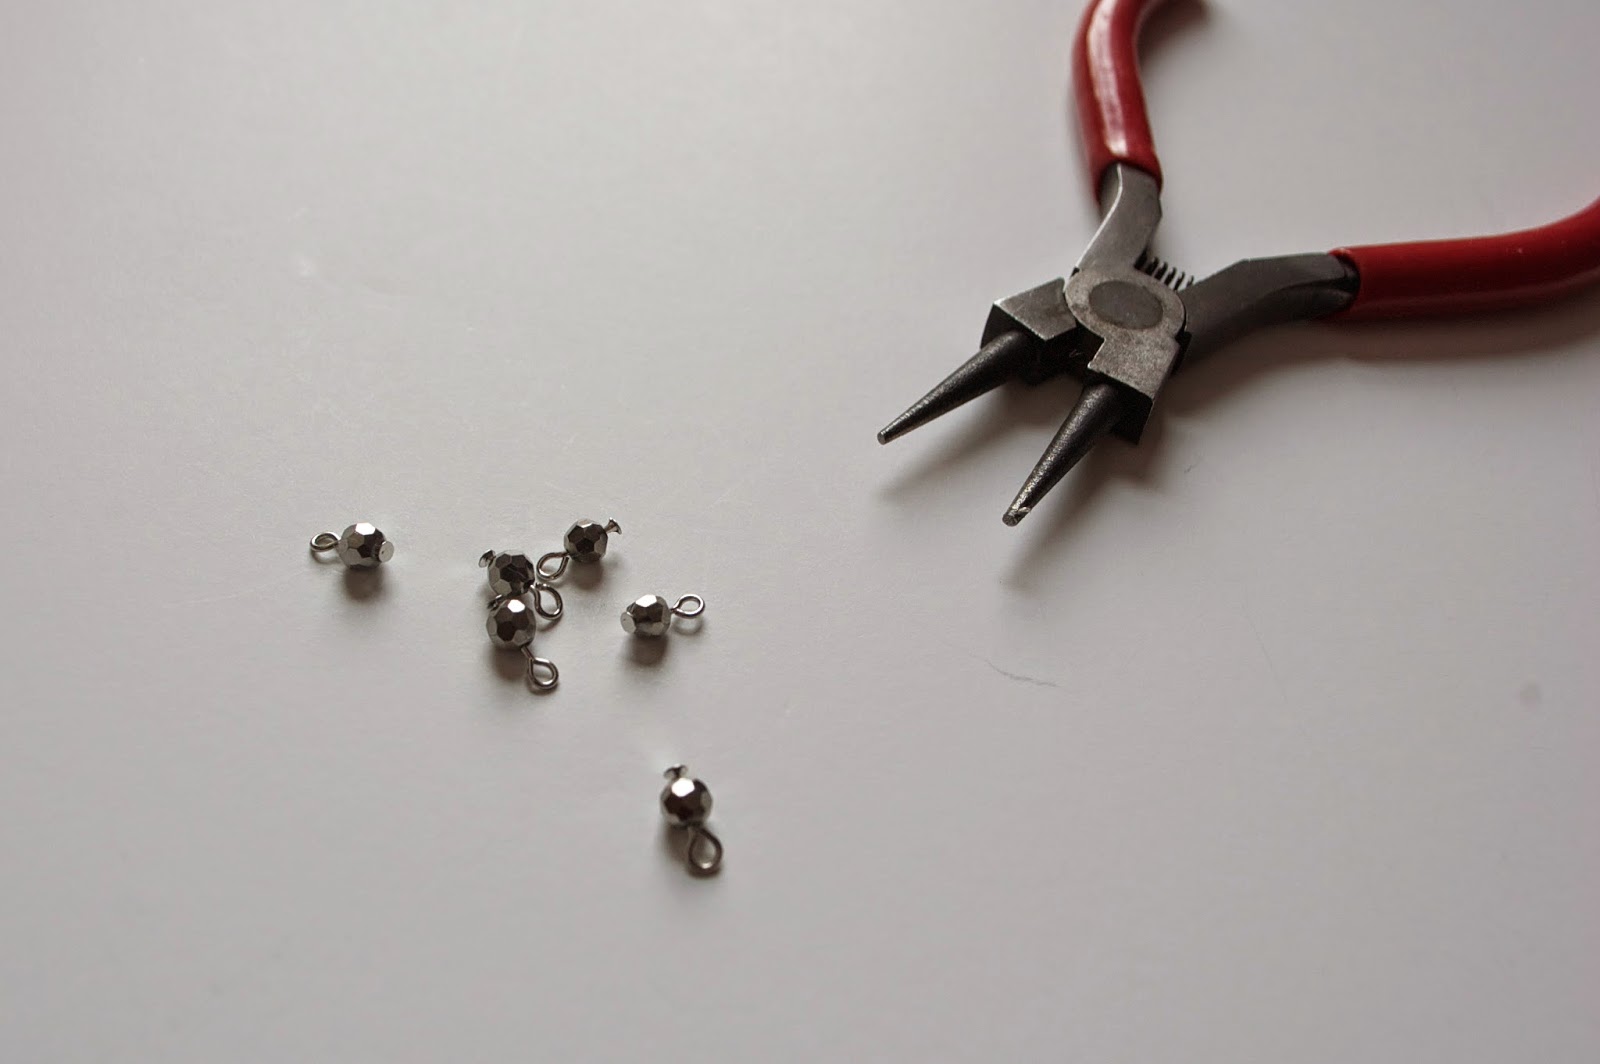
Use needle nose pliers to bend the head pin 90 degrees directly above the bead

Use wire cutters to trim off all but about a half inch tail on the head pin

Use round nose pliers to bend the wire tail back into a loop

Use needle nose pliers to open a jump ring and string it into the hole in the metal wire piece

String on your beaded dangles - I used 14 dangles per each earring but amount will vary depending on how large your beads are!

Close the jump rings using pliers again

At this point your earring is almost done so take a moment to figure out how long you want the earring to be. I wanted mine a little shorter so I trimmed the metal wire piece up with wire cutters.

Use your metal hole punch pliers to again punch two holes in the other end of your metal wire pieces

And use these two holes to attach silver ear wires into

And then that's it; you're done!

These earrings are pretty simple and basic to make but using the technique of hammering the wire pieces gives them an extra punch of elegance and makes them just a little more interesting!

If you liked this tutorial, be sure to follow along on my blog to catch other tutorials like it I post each week! You can also find me on facebook, twitter, pinterest and instagram.  Happy beading everyone!

Running my First 5k

Well it's been about another month since my last weight loss update and I'm happy to report I am down another 4 pounds for a total weight loss of 82 pounds. That means only 18 more pounds until I hit my (revised) goal weight!!!


Man, am I HAPPY I started this journey just over a year ago!!!!! There was NO WAY I could picture myself where I am today when I started. Over the past month I hit a big milestone for myself: I ran my very first 5k!

I've never really liked running but I do it because I know that it really pushes my body. It's never been easy for me especially at the beginning but knowing that I have to work for it makes me want to (strangely) keep doing it more and more. So I have run a lot over the past year, but I've never signed up for an official race. It was intimidating, I had to feel mentally AND physically capable of being able to complete it before I could sign up.  I've ran so much further than a 5k in the past (I've done 7 miles outside at my max! With some walking breaks) but I felt like I had to be able to run the 3.1 miles outside without stopping before I could sign up.  Eventually I figured that was dumb and if I really needed to stop and walk I could just do it!!! So I finally signed up for a race to force myself to get ready!

Of course this burst of willpower led to me signing up to a race in the near future which happened to be on Valentines day in the dead of winter here in PA so it's freaking cold out!!!  I practiced a few times on the treadmill and then a week before the race I went outside to practice on the road (running on the treadmill always seems easier to me than outside!) and I finished in just under 30 minutes so I felt confident enough for the race.


I drug my hubby and pup along with to practice too. Jefferson could keep up well enough, my hubby not so much. Hah! I can make fun of him just a little because I've never been more in shape than him before now so I can brag a bit haha :)

Race day came along on Valentines day and I was hoping for weather in the mid 30s with some sunshine....nope. It was 20 degrees out and cloudy and oh-so-cold!!!! I bundled up anyway though and showed up to just get it done. I felt very official getting a bib and everything!

As for running the race? My only goal going into it was to finish in under 30 minutes, which I did!!!! I ran faster than I ever have before!!! Maybe the cold helped make me go faster hah.  When I first started running I was so cold that my TEETH were cold. I mean come on. Hah.  Eventually though I got moving and warmed up some.  The course had a few small hills, not really that big in the grand scheme of things but I tend to stay FAR AWAY from hills on all of my own runs so it was a bit of a challenge.  I just kept pushing though and made it through.

A little after 2 miles I stopped to walk for about 15 seconds.  And you know what? I don't feel bad about it! I just needed a couple of seconds to catch my breath to keep going stronger.  Just a couple seconds after I stopped a guy ran up behind me and said "2.3 miles, you got this???" and it made me smile and I said back with more confidence than I've ever had, "Yeah, I got this" and I started running again.

Eventually I ran back to the finish line area, and as I got closer I saw the official time clock at 26:43 and I thought, wow!!! I will definitely finish in under 30 minutes so lets make it under 27 and I sprinted to the finish line and beat the clock to 27.

A couple seconds later I stopped my run on Map My Run and check out those splits!!! 8:43 pace.  That is really good for me!!!! I started at like 12 minute miles PLUS when I first started!!! I'm so glad I made myself sign up because I really didn't think I was capable of finishing like this.

The only negative thing is when I went online to check my official time it had me at 28:19.  Which is still better than I thought I would do but I don't know how because I remember running so fast to get to the finish line before the clock reached 27 minutes.  Even Map my Run had me closer to 27 than 28:19.  Whatever the case though I still did so much better than I thought I could so I am super proud.

I know that running 3.1 miles is not the biggest accomplishment in the world, but it really does mean a lot to me.  In high school I was always the girl that sucked at just running the ONE mile that we had to do every year. I remember finishing it and breathing so hard and another skinny girl in my class telling me that I just really needed to get my breathing under control and calm down. Ok, yeah, thanks a lot for the help I'll get right on that after I finish dying over here.  It means a lot because even when I was 246 pounds last January I had enough motivation to get on that treadmill and push myself to work hard. It means a lot because when I was {slightly} lighter last spring I had enough courage to put on my sneakers and hit the running trail near my house and I MADE myself run outside even though I hated it and it was hard and my thighs rubbed together and all the fit people were passing me but I got out there and did it anyway. Running has NEVER been something I was good at but I made myself do it because I wanted to change and I have, so I will definitely celebrate this little 5k finish :)


Besides running a 5k one other thing I did different this month was I've started meal prepping my lunches.  I used to take the same exact lunch every day to work: a low fat yogurt, low fat cheese string, apple and granola bar.  It was getting old and it wasn't the most filling.  I started roasting broccoli and cauliflower, sweet potatoes, and bringing rotisserie or grilled chicken with a side of fruit now.  It's a little more calories than my old lunch but they are all whole and very healthy foods and keep me more full for longer so I'm enjoying the switch!

This past month I also fit into my very first size EIGHT skirt. Bow chicka wow wowwww. Single digits???? I don't even remember the last time those fit.  I bought a few other tops while out shopping and they were all size SMALLS. What??? Me, a small?? :)

It's getting pretty noticeable that I've lost so much weight.  I've been going to the same Zumba class for the past like year and a half that is pretty clicky and I don't really talk to many other people in it, but this past month two different ladies from my class came up to tell me how good I was looking! Also today I walked into my mom's work and she said she didn't even recognize me at first.  I was like...uh why? Hah! She said because I look so different!

If I kept up this 4-5 pounds a month weight loss I would reach my goal by mid summer which would be fun. I'm still really hoping to be able to rock a bikini this year.  We will see how things go though, I tried my bikini on again on Monday and I was VERY glad that summer is still a few months away, hah!

Your Whims Wednesday #201 {And Features}

Time for another Your Whims Wednesday Party!

Your Whims Wednesday

Here are some of my favorites from last week!

Double Dark Chocolate Cookie Cups by Spoonful of Flavor
Double Dark Chocolate Cookie Cups - dark chocolate cookie cups are topped with rich  and creamy dark chocolate frosting!

Bubble gun Lip Scrub by Hairspray and High Heels
Save your cash and pamper your lips at home with this amazing DIY Bubblegum Lip Scrub! Your lips will thank you!

Swiss Meringues by From the Family
Swiss Meringue Cookies Recipe From the Family WIth Love main
 
"Love" Hoop Art by Happiness is Homemade
Valentine's Day Decorative Hoop Art
 
Thanks to all who linked up! Grab a button if you were featured :)
 
Featured on My Girlish Whims
 
Now... onto this weeks party!

I show off my girlish whims weekly on my blog, and now I want to see yours with 
Your Whims Wednesday!

Guidlines:
1. Link up as many projects as you would like: as long as it is one of your girly ways, you can link it! I'd love to see crafts, recipes, style posts, etc. Anything and everything feminine :)
2.Please add my button (code at the top of this post) to either your blog post or somewhere on your blog. 
3. Take a quick moment to comment on at least one other entry. We we all love comments!! 
4.I'd love if you would follow me as well :)


DIY Cord & Crystal Necklace


So as I sit here typing this Sunday night it is currently 10 degrees outside and feels like -4.  Good news though, it's supposed to go all the way down to -2 tonight! Oh wait, did I say that was good news??? This is good weather to do nothing but snuggle up inside under some blankets and talk about a fun new DIY jewelry project, right???


This DIY Cord & Crystal Necklace comes together in under an hour and doesn't require many jewelry making skills at all! I think the use of cord instead of beading wire or chain makes this necklace just a little extra special!


Here is how to make your own!

Supplies:
Black satin cord, cord ends, metal charm bracelet, crystal snaps,  jump rings and a toggle clasp.

Steps:
The crystal beads I used on this necklace are actually a part of the "Snap in Style" line from Cousin Corporation.  The snap bases came off of a metal charm bracelet which I just removed from the chain bracelet to use for this necklace.  First step is to snap the crystal bead onto the snap charm base.

...easy enough so far...right?? ;) Do this for all six crystals and set aside.

Cut a length of satin black cord to your desired necklace length.  Be careful as the ends fray easily so either wrap them with tape or just be gentle as you work with them! Using your glue of choice (I just used hot glue but E-600 would be a good option as well) fill up the metal cord ends full of glue and then insert the cord into the metal cord end.  Hold in place until glue is dry.

After they are dry your necklace base should be ready to work with.

Find the center of your cord and then go over about an inch to the left.  Use needle nose pliers to grab a jump ring and carefully pull apart the satin cording to loop the jump ring through one piece of the cord.

Link a crystal charm through the jump ring and then squeeze it shut using jump rings.  Repeat for another charm on other side of the center of the cord.

Repeat this process for the remaining crystal charms.

To finish off the necklace, use jump rings to attach a toggle clasp to ends of the metal cord ends.

Once everything is connected, the necklace is done!


Pretty simple, huh? The really cool thing about using the snap bases is that if you ever get tired of the crystals you could buy some different snap charms and swap them out for a new look!

I think it lays really nicely when you wear it, the crystals charms give it a little bit of bling which I'm always a big proponent of ;)


I think this is enough pictures of me standing outside in the snow with no coat on though, I'm getting cold just looking at these pictures haha!


I'm supposed to be unbearably cold tomorrow (Monday) as well but luckily I have the day for President's Day (thanks presidents!) so I think I will just stay inside again bundled up under lots more blankets and work on my next jewelry project!!