Your Whims Wednesday #205 {And Features}

Time for another Your Whims Wednesday Party!

Your Whims Wednesday
 
 Here are some of my favorites from last week's party!

Bunny Banner by Atta Girl Says
Pottery Barn Inspired No-Sew Easter Bunny Banner
 
Yogurt Cake with Ganache by The Gracious Wife
Easy Yogurt Cake with Ganache and Fresh Berries. #cake #chocolate #ganache #berries #ad #MullerMoment From TheGraciousWife.com
 
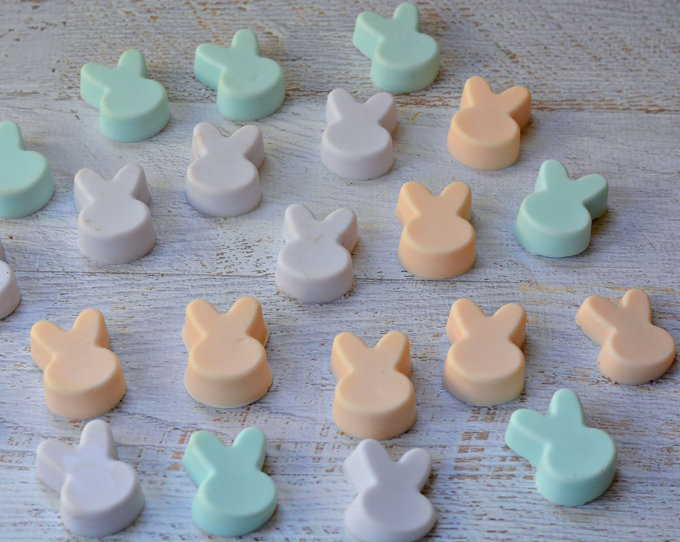
DIY Soap by Growing up Gable
Pastel DIY Soap with Essential Oils
 
Easter Decorations by Julie is Coco and Cocoa
easter wreath
 
Thanks to all who linked up! Grab a button if you were featured :)
 
Featured on My Girlish Whims
 
Now... onto this weeks party!

I show off my girlish whims weekly on my blog, and now I want to see yours with 
Your Whims Wednesday!

Guidlines:
1. Link up as many projects as you would like: as long as it is one of your girly ways, you can link it! I'd love to see crafts, recipes, style posts, etc. Anything and everything feminine :)
2.Please add my button (code at the top of this post) to either your blog post or somewhere on your blog. 
3. Take a quick moment to comment on at least one other entry. We we all love comments!! 
4.I'd love if you would follow me as well :)


DIY Copper Beaded Chain Necklace & Blog Hop

Today I have a cute new necklace tutorial to share with a fun twist!

This cute copper necklace features a variety of bead types sandwiched between different layers of chunky copper chain to create a fun and stylish statement piece.

I really love how this necklace turned out and I think it's extra special because I had some special inspiration behind this necklace...

This project was part of a fun design challenge that the Cousin Creative Circle Ambassadors decided to do! Dawn selected a variety of beads and supplies to give to each ambassador to create whatever we wanted with.  Each of us ambassadors have very difference design styles so it should be really interesting to see what everyone else will make! Here are the supplies we were each given to work with, all are from Cousin Corporation of America and can be found on their retail site Prima Bead or at most of your local craft chains.

I immediately gravitated towards some of the smaller beads that had some sparkle.  I decided to stretch myself and ONLY use beads I was sent for this project, and luckily Dawn picked out a good variety so it's wasn't hard to make a cute project with them.

Here is a step by step tutorial to make my necklace!

Grab some small round stone beads and copper eye pins along with needle nose pliers, round nose pliers and wire cutters.

Thread the stone beads onto the eye pins

Bend the wire 90 degrees with needle nose pliers directly above the beads

Trim the wire tail with wire cutters to about a half inch length

Grasp the end of the wire tail with round nose pliers and bend back around into a loop

Next, cut two lengths of copper chain the same length.

Use needle nose pliers to attach a stone bead link onto the third link on one piece of chain

Alternating links, attach stone beads all the way across the piece of chain

Use pliers again to attach the other end of the beaded links to the other copper chain

This will make the first layer of your necklace

Make more beaded links repeating the above process with some small flat crystal beads

Use needle nose pliers to attach these links to the second piece of chain in the empty alternating chain links

Cut another piece of chain and attach the other end of the crystal links to the new chain piece


Your necklace should now have two layers and lay like this:

Connect the last link of the third chain piece to the last link of the second chain piece for a more cohesive look.  Do this for both sides of the necklace.

Create another layer on your necklace by making more links with bugle shaped crystal beads and attaching them onto the third piece of chain again in the empty alternating chain links.

Cut a forth piece of chain to attach to the other end of the bugle bead chain links.  Connect the ends of this chain back up to the third piece of chain again using jump rings on either end.

Now, you could stop here but I wanted one more slightly different layer to the necklace.  Make a bunch of beaded charms using some crystal rondelle beads by threading them onto a head pin and creating a simple loop on top.

Thread this simple loop on each bead charm onto the SAME link on the fourth piece of chain that the bottom end of the bugle bead links are connected to.

Squeeze each link shut with needle nose pliers and repeat across the entire length of the fourth chain like so:

Now that the beaded "bib" portion of the necklace is completed, we just need to add some chain on each end! Cut two piece of copper chain and attach each to the first piece of chain you cut on either end using jump rings.

Use two more jump rings to attach a clasp to the other end of the chain pieces.

After the clasp is on and connected your necklace is done!

Sometimes when I make jewelry projects for the blog I set the piece aside to eventually sell or gift to someone...not the case with this necklace.  As soon as I made it I knew it would fit perfectly in my own personal collection. I just love how it looks on! I feel like I could wear it with a bunch of different outfits.

This piece definitely shows my own personal style but is a little different from something I would normally make.  That's the fun part of letting someone else pick out the supplies for you to work with, you are forced to get a little extra creative to make something work!

So now you know what I made....

But what about everyone else??? The creative inspiration doesn't stop here! Be sure to hop over to the other fabulous ambassador blogs to see what everyone else made with the same supplies!

Allison Cooling of Quiet Lion Creations
Dawn Doucette of Bella Amore
Shelly Owen of Raziela's Rant
Rachel Nielsen of Adventures of a DIY Mom
Molly Alexander of Beautifully Broken Me
Carolina Moore of 30 Minute Crafts
Lisa Crone of A Bead a Day

Copy Cat Anthropologie Earrings


What is this, I have a new jewelry tutorial to share??? Ye gods! Heh :) It's been a little bit since I've last posted a tutorial but I finally have a new project to share with you....and get ready! It's everyone's favorite...an anthro-knock off!!

I was scrolling around  the jewelry section of Anthropologie's site online and came across these really pretty Beaded Lochan Earrings. I loved the crystals and the wire wrapping and tiered oval drops...a great design in my opinion!

I thought I would make my own version in pink (of course) because this is my blog about my girlish whims and when pink is an option I'm always going to pick it ;) I think they turned out super girly and cute!

Here is how to make your own version!

Supplies
Gold wire in about 16 and 26 gauge, light peach crystals, pink crystals peach crystals, earring wires, needle nose pliers, round nose pliers and wire cutters.

Steps:
 Cut a length of 16 gauge wire useing wire cutters and form into a "U" shape.  Use needle nose pliers to bend one end back 90 degrees

Use round nose pliers to bend the end back into a loop

Do the same thing for the other wire end but bend it horizontally like so:

Grasp the end again with round nose pliers and bend back around into a loop

Hook this new loop around the original loop and squeeze it closed using needle nose pliers

Repeat this process for a total of six wire loops in three different sizes.  Please note that I have completely NOT perfected my wire wrapping skills...I'm sure with practice you could make your loops a lot nicer than these but I was just making these earrings for myself so they don't need to be 100% perfect :)

Now it's time to start wire-wrapping the crystals onto the wire loops!

Cut a length of long wire using wire cutters and wrap it around the top of your wire loop a few times

Add on one crystal at a time and wrap the wire around the loop in between each crystal

Repeat until you have enough crystals to fill up the wire loop and then wrap a few more wraps of wire at the end of the loop to secure and then trim off any excess wire.

One pretty little beaded loop ready to go :)

Start wrapping the second largest wire loop with another color pink crystal. Wrap halfway around the loop and then interrupt the pattern by wire-wrapping the large beaded loop onto the loop you are currently working with.

Wrap a few times to secure and then pick up the pattern of wire wrapping crystals back onto the loop

Should look like this when you are done:

Next start wire wrapping crystals onto your smallest loop again stopping halfway around the loop

Wire wrap the other two loops onto the small loop and then continue adding crystals to the small loop.

After everything is attached it should look like this!

Last step is to open up the simple loop at the top of your wire loop with needle nose pliers and add on an earring hook.  Squeeze the loop shut again with pliers and you are done!

A pretty and playful pair of pink earrings.  If i could have used any more "p" words in that sentence I think I could have won a prize ;)

These are NOT small earrings, they definitely make an impact when you wear them! But you can always alter the size of them somewhat by how big you make your wire loops.  I'm not afraid of big earrings though and I don't think you should be either ;)

These pink colors are perfect for spring, but of course you could always pick your own favorite color crystals to make these earrings whatever color you want!

Because after all, it's super hard to talk about spring or spring colors when my back yard still looks like this:

BAH. Bah humbug mother nature! Alas.  I will keep on making spring jewelry despite the fact that it still looks like a winter wonderland around here!