Showing posts with label pillow. Show all posts

Rose Trim Pillow

You all may remember hearing about the WholePort Creativity Expo. Basically, they gave you free craft supplies. AWESOME. This is the one I picked:


Very girly :) A pretty light pink rose trim. And here's what I made with it:


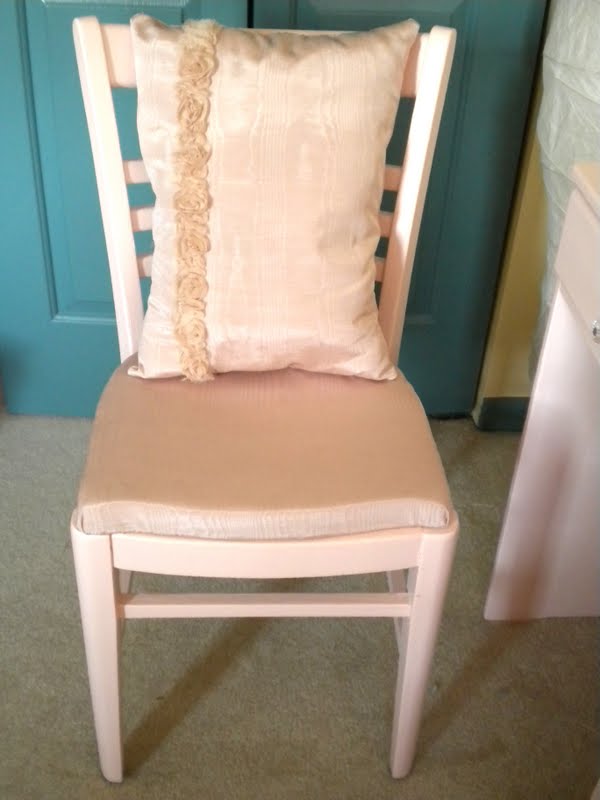
A pillow for my pink chair I recently redid!

I had leftover fabric from covering the seat of the chair. I bought it as a remnant originally for like $2 bucks, and then add on a free pretty trim?? This pillow cost me NADA to make. Most excellent :)

I cut out my pillow pieces and laid the trim down on the front piece. I was going to pin it down and sew it...

But I really suck at sewing and thought the flowers would all get stuck on the foot of the sewing machine....so I just hot glued it on. DON'T JUDGE ME OK??

I pinned the pieces together

And at least sewed the ends of the trim on for good measure :)

I made my own stuffing for the pillow by cutting up ends of quilting batting my mom had. Stuffing is freaking expensive. Cutting up enough batting by hand was also very tiring though....sigh. The price of frugality.

I finally cut enough stuffing and sewed up the last side using a blind stitch. I'm getting better at this stitch...it kinda looked semi-normal when I was done. I was very proud of myself.

And here it is altogether! My pink desk redo and my pink chair redo is now complete with this cute little pillow :)



Thank you WholePort for the free supplies!
If you would head over to the WholePort facebook page and like my entry I would love ya! I could win $50 for MORE free craft supplies. Whoopie!!

I'll be sharing this with all the link parties in my header including Today's Creative Blog and Christina's Adventures

Cherished Treasures”=

Felt Flower Pillow Tutorial

My tutorial for this week is this cute felt flower pillow!


Here's how to make it:

Supplies:

-Felt
-Scissors
-Fabric Mat/Ruler/Cutter
-Needle & Thread
-Beads
-Trim
-Ribbon
-Paper
-Pillow Stuffing
-Hot Glue (optional)

Steps: 

Step 1: Cut out two squares of felt for you pillow.  I made mine about 20 x 20 inches.


PS. I bought two yards of felt cause it was so cheap.  IT WAS SO MUCH FELT! You only need like half a yard. I was up to my ears in felt!!!

So much felttttttttt.
Step 2: Pin together and then sew one side of the squares


Step 3: Open up your squares, and then pin down and sew on a fun trim a little above the middle of the square


Step 4: If you want, you can repeat step 3 and sew on your ribbon beneath the trim.  I'm not the best sewer though and you would be able to see my stitches across the ribbon more than you could on the trim, so I hot glued mine on. :)


Step 5: Time to make those cute little flowers! I used this guide from the DIY Dish and cut out two of the second largest flower pieces, one in the size smaller than that, and one in the second to smallest size.


Step 6: To give the flowers more volume, sew a stitch through each petal.  Pinch each heart section together and then sew through a few times. 


Step 7: Stack the parts on top of each other, and sew together adding a bead onto the middle.


Step 8: Make three flowers, and then sew them on top of the pillow front above the trim. 


Step 9: Turn the pillow sides inside out, pin together and sew together the other three sides, leaving a space open on the bottom. 


Step 10: Stuff the pillow, and then hand sew together using a blind stitch. 


And your done!


I did a tutorial on that middle pillow here.

I love how these pillows go together! I get compliments on them all the time when people visit my dorm room.  They don't realize they are hand made!

I'm linking this project up to all the link parties listed in my header!

Also linking up here:
Visit thecsiproject.com

Pink and Frilly Pillow Tutorial

Okey doke. I'm going to try my hand at this whole tutorial thing.  I go back to college soon and needed some pillows for my couch and so I decided to try and craft my own!  

Warning... I haven't made a pillow since seventh grade so it's not perfect...but I still love it!

Here it is:


Pink and Frilly! My favorite kind :)

Here's how to make it. 

Supplies: 
-About half a yard of fabric (I just used a simple cotton)
-Two different trims
-Needle
-Thread
-Hot glue gun
-Fabric cutter, guide, and mat
-Sewing Machine
-Pencil
-Scissors
-Pillow Fluff

Steps:

Step 1: Cut your fabric into two squares, about an inch longer than you want your finished pillow size to be

two cute little pink squares :)
Step 2: Iron your fabric and pin it together right sides together.  (That's the domestic sewer term for putting the good sides facing each other, leaving the bad sides on the outside. My mommy taught me this today)

Step 3: Break out the sewing machine and sew together three sides, and a third of the way in on each side of the fourth side.


Make sure you leave enough space on the fourth side to turn the pillow right side out.

Step 4: Reach in through the open space on the fourth side and turn the pillow inside out.  Measure five lines across the pillow with a pencil.


Step 5: Attach the trim to the front of the pillow.  I just hot glued mine down, although I suppose if you want your pillow to be more legit you could sew it.  But hot gluing was easy and you can't even tell with the final product. Shhhh don't tell anyone


Step 6: Sew one of the trims along the three fully sewed sides of the pillow. 


Step 7: Stuff the pillow! 


Step 8:  Sew up the rest of the fourth side using a blind stitch. (Had to ask mommy what kind of stitch was needed for this. "Blind Stitch? But I can see!!" If you don't know what a blind stitch is and your mommy isn't around to help, here's a quick video that shows you how.


Yikes. My blind stitch really does look like I'm blind.  But it's ok because it gets covered up in the next step!

Step 9: Sew the rest of your trim over the fourth side of your pillow and viola!

It's a pillow!


It'ssocuteandpinki'mgonnadie


Link Parties: