Showing posts with label organization. Show all posts

Towel Bar Accessories Organizer

As a big girly girl, and especially as a girly girl who makes jewelry, I have a decent amount of accessories. And ever since the large/chunky/statement necklace trend hit, my poor little jewelry box has not been able to keep up.

I needed some sort of solution to easily store all of my big necklaces.... I remember seeing SOMWHERE on pinterest someone using a towel bar to store jewelry, so I decided that might be an easy fix!


So far it has been the PERFECT solution. No permanent holes in my walls and it was very cheap!  The towel bar hit over any regular door and has rods perfect to store accessories off of.

The bottom rod holds most of my necklaces.  I bought "S" shower curtain hooks from Target and hung them off the bottom rod, leaving another end free to hang necklaces off of.

I bought plain circular shower curtain connectors from Walmart for about 2 bucks to store my scarves with.  All I had to do was make a simple knot with the scarf onto the circle and then open the circle and attach it to the top rod.

The middle rod left some room for some of my chunkier bib necklaces

So many pretty necklaces!!!! I love being able to see them all out in the open now - I wear so many more of them!

I bought my towel bar from a local bed bath and beyond, but you can also find them pretty cheap from amazon.  Here are two I found quick (affiliate links):


Now I can check necklace and scarf storage off my accessories organization list....now just to tackle the bazillion earrings I've got!!!

I'll be linking up to these parties:

Jewelry Organizers Round-Up

I seriously need a new system for organizing my jewelry. 

I snapped these embarrasing pics real quick from my phone this morning...talk about scary!

This is the top of my dresser. don't judge! hah

If you move aside that cute tank top you will see that a mess of necklaces, nail polish, and oh look! There's where my extra gum went. 

My jewelry USED to all fit into this box.  But then chunky necklaces came in style...and oh yeah I make jewelry  and always seem to be adding on to my collection. So basically, things are not working out like this anymore.

When I was in college I made this jewelry organizer to hold some of my biggest jewelry.  It worked alright for college, but now that I'm in my own house I want something bigger...and not quite so pink hah.

Here is some inspiration I've found from pinterest/blogs recently:

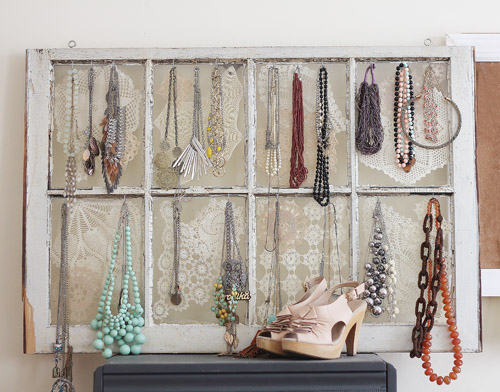
  Window Pane Organizer by Tick Tok Vintage


Radiator Screen Earring Holder by I Heart Organizing  

 
Earring Holder by Craft-O-Maniac 

hanging jewlery organizerHang Your Jewelry with Paint Sticks by Infarrantly Creative

 
Jewelry Frame Organizer by 346 Living

Pinned Image 
Frame and Shelf Jewelry Organization by Twinkle & Twine

Molding Jewelry Shelf by Yepadoodle Craft

Has anyone else seen any good ideas? I have a LOT of jewelry and I want to be able to see it all easily. Then again, I don't want a whole wall in our bedroom dedicated to displaying it!  At this point I'm thinking  maybe a few molding shelves (like the one right above here) and a frame with some screen for earrings. Maybe it's time to take a trip to the hardware store....

Any tips appreciated! :)

This post sponsored by:
Miracle Canvas

Miracle Canvas is an online store for single and multi-panel canvas prints. A canvas print is an image printed on canvas, stretched on a canvas stretcher, and fully ready for hanging in a room. 

Bead Organization Fabric Covered Magnet Board

I'm slowly working on turning my craft room into an organized and girly space! Today I want to share my newest project for the room: 

 Bead Organizer Fabric Covered Magnet Board


I'm so pleased with how this project turned out! I'm a very visual person when it comes to crafting.  I get inspired to create by looking at and playing around with my craft supplies.  I wanted some way to organize some of the good beads I had so I could easily see them and use them to craft with.  

The main part of this project was the magnetic board. I got it at IKEA for only $12.99, it's called the SPONTAN Magnet Board
The other supplies needed were about a half yard of fabric (I used Turn of Events in Plum from Hawthorne Threads), scissors, Mod Podge, and a brush.  Not pictured is a hot glue gun, magnets, and bead holders.

I cut the fabric to slightly larger than my magnet board and then just applied Mod Podge over the fabric to adhere it to the board.  I did two total coats, and let it dry for a day before putting on the second coat. 

After the top was dry, I trimmed away some of the fabric from the sides and then just wrapped it around and hot glued it to the back of the board.  Yeah yeah, not the prettiest looking but it's in the back so it doesn't really matter anyway :)

After the the board was all ready, I called on the lovely hubby who begrudgingly hung it up for me above the second tier on my craft desk (he's been hanging lots of things recently for me since we just moved haha) 

Very pretty! :)

After the board was done I set to work getting my beads ready to go on.  I got a bunch of little metal containers from Pick Your Plum on a deal they had (I found some similar ones on Amazon:)
 

and I ordered magnets from Amazon - affiliate link below.  These magnet were great, the perfect size for the back of the containers but were strong enough to hold a container full of beads.


I hot glued the magnets to the back of the containers

And then filled them all up with pretty beads! And tried to line them all up pretty for a picture and then just got wayyy to frustrated with all the magnetic forces going around :)

The last step was just to plop the beads onto the board!


Close up of all the pretty beads :)


I love it! The board is right above my main work space in my craft room, so whenever I look up I can be inspired!

Are you a jewelry maker? How to you store your beads?
homemade crafts

Washi Tape Craft Room Organizers

Lately I've been working on getting my craft room nice and organized and all girly-ed up. I want to save the final product for a "big reveal" but I thought I'd share a few "sneak peak" projects along the way!!

Here's what I'm sharing today: Washi Tape Covered Craft Room Organizers!!

I had bought a few of these 99 cent containers from IKEA awhile ago, and never had a purpose for them. 
 On a recent trip to IKEA I figured I would by the rail that they are meant to hang from (only $1.99!) so I could finally use them!!
The only thing about these containers was I had bought the white ones before, and they were just kind of bland.  And when I went back to IKEA I didn't really like the color of the pink or purple ones...so I decided I would try to cover them in Washi Tape to girly them up!

I used four different kinds of Washi Tape: the bottom three are from Pretty Tape on Etsy and the top one I got from a deal from The Plaid Barn

It was a little tricky getting the tape to lay straight....the one on the right I did first and you can really tell - hah!! At least I got better as I went along.


In the end I think they all turned out adorable!

I've got paint brushes in one; scissors, glue, & my rotary cutter in another; beading tools in the third, and some more random jewelry tools and glue sticks in the last.

Check out all these paint brushes!!! I really needed somewhere to keep them all!

I love my new organizers! I hung them up over my craft desk/work space. You'll be able to see how it all fits in when I do the big reveal....probably not for a little while still.  I've got lots of craft supplies to organize still!!

 I'll be linking up to these parties: