My Favorite Idea for Save the Dates

It's that time of year again...wedding season!

I've had a few friends get engaged recently and it makes me so excited for their upcoming weddings! Weddings are just the best, am I right??

Weddings are NOT the best for your wallet though.  I know! We got married less than a year and a half ago! However we were very budget conscious during our wedding plans. I had just graduated college, and we were buying a house and getting married at the same time.  We didn't want to start out life in debt from a one day event.  You can see all of my tips on how to have a cheap wedding I posted before, but I wanted to repost on one of my FAVORITE ways I cut costs for my wedding: the save the dates!

Here's what our Save the Date's looked like:


Not too shabby, right? I designed them myself on a free picture editing program, and then got them printed as postcards.   Want to know how much it cost me to get them printed? 8 bucks! I LOVE A GOOD DEAL!!!

I uploaded my own image to Vistaprint (paid $1 for that) and then had 100 cards printed and shipped to me for a total of $8. I mean, it doesn't get much better than that! All because I had an AWESOME coupon! And there are always tons of Coupons for Vistaprint available.

Another great thing about sending out these Save the Dates as post cards is that I only had to use post card stamps which are cheaper. So TOTAL for postage and cards I spent only around $30. I mean, can you beat that????


I could NOT have been happier with Vistaprint for these Save the Dates.  They looked cute, were super cheap, had quality printing, and were super functional! If you are looking for ways to cut back costs on a wedding this is such a perfect place to start! So spread the word to any brides you know - affordable weddings ARE attainable and this is the perfect way to start!

Styled by Tori Spelling: Easy DIY Jewelry {GIVEAWAY!}

Disclosure: I was provided these items free of charge but not compensated for this review.  All opinions are my own.

I write a lot of jewelry tutorials on my blog.  To me, jewelry making is easy! I try to show that in my tutorials, but sometimes readers are still intimidated to try it for themselves. If you fall into that boat, I've got good news! 

Styled by Tori Spelling is a fun and stylish DIY jewelry line currently only offered at Jo-Ann Fabric and Craft Stores.  I was sent some pieces to try out and BOY did I have a good time :)

The most awesome thing about this line is that it still gives you a chance to design and be creative in the pieces you create, but you DO NOT have to know a bunch of jewelry techniques to do so!

Here are some of the cute earring bases I was sent:

Want a cute new pair of earrings in less than a minute? Take an earring base and some ear wires:

Open up the ear wire, slide on the earring base, BAM. Done.

In less than 5 minutes I had four cute new pairs of earrings.  If you use the ear wires included in the line you do not even need any tools to make the earrings.  If you do have tools and regular "fish hook" ear wires, you can still use those on the earrings.  That's what I did with the top gold earrings in this picture:

After I made myself some new earrings, I took a look at the cute necklace parts in the line!

Hello lovelies:

I chose my statement necklace of choice and gathered some matching supplies:

To put the necklace together, just use one of the connectors to attach the necklace base to the chain on either side.

Bam. Necklace DONE.

The best part? I can use that same chain for another necklace! Just open up the connectors and swap the chain onto a new necklace.

So easy. I could do this all day.

My next design dilemma: this cute pendant! I really liked the pendant but didn't get any chain in the collection that matched it. 

Well, I didn't have to think for long, because the great thing about this line is that you can also use the pieces in a more traditional jewelry making sense as well.  I just grabbed some chain from my own collection, some jump rings and a clasp and whipped up a super quick and easy necklace.

I love that the main design component of this necklace (the pendant) was already made, so it only took me a few minutes to make my own fashionable necklace using real jewelry making supplies.  And I could have made something fancier or more elaborate if I wanted!

Here's my cute new necklace on:

So in review, I love this line because:

1. If you are not skilled at making jewelry it allows you to make cute, fashionable jewelry super easy...
2. If you DO have experience using jewelry, you can still use the components as regular jewelry supplies to make your own creations!

Now I've got some GOOD NEWS! Darcie Crafts is giving away a Styled by Tori Spelling prize pack valued between $50-$75 for one of my lucky readers! Use the widget below to enter - GOOD LUCK and happy crafting!

Giveaway open to US only.

Your Whims Wednesday #117 {And Features}

Time for another Your Whims Wednesday Party!

Your Whims Wednesday

Here are my favorite projects from last week:

Shutter Headboard by The DIY Dreamer
Shutter Headboard Tutorial

DIY Family Rules Wall Art by A Step in the Journey
chevron buffet

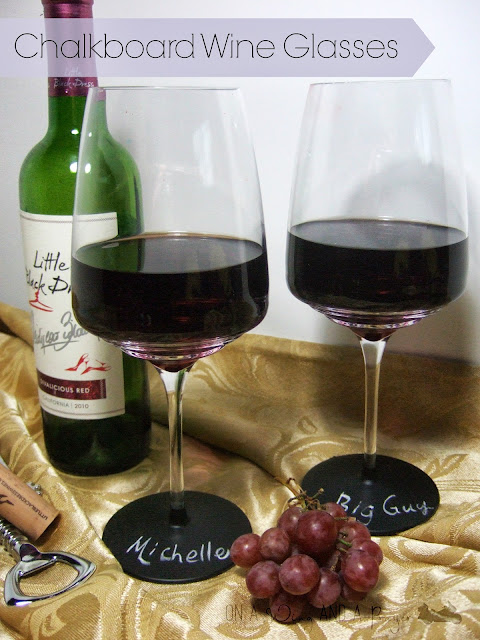
Chalkboard Wine Glasses by On a Wing And a Prayer
https://blogger.googleusercontent.com/img/b/R29vZ2xl/AVvXsEgaUM0t4SbGVVvPFWTkTZWhdayfd4EQVGDfSpx61GXRPi7tlEd0g9m3ABCkM0IcIxiL5wJOfdOC9NNZcrVwofYXTXtYr3cntKABSVr4BKbHoYVtH9qb16kcg3M2B2wkNUHlBaP3MuNrJdc/s320/Main+Photo.jpg

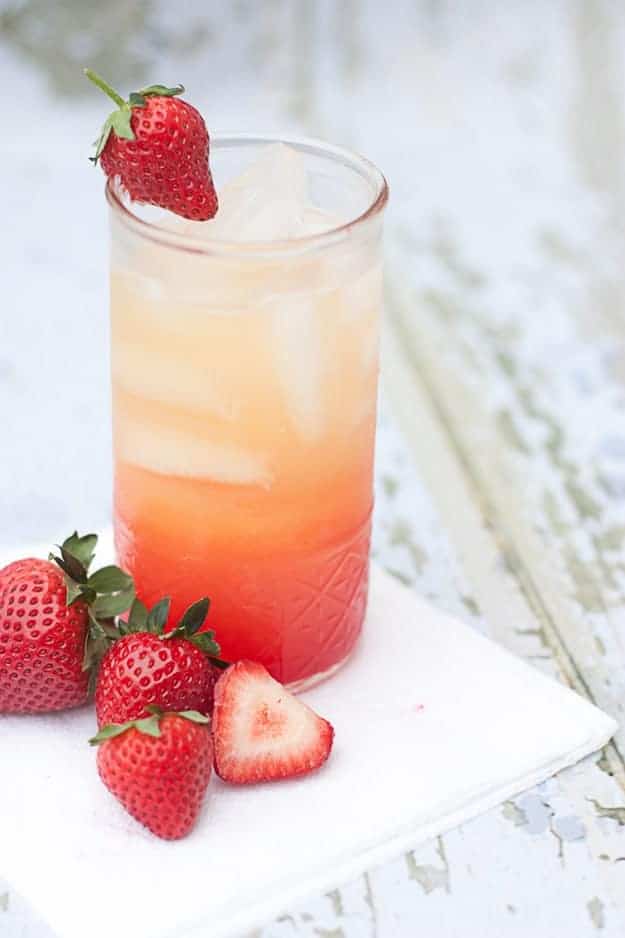
Orange Berry Sunrise Spritzers by Design Eat Repeat
Non-Alchoholic Summer Spritzer | Use Orange Juice, Lemon-Lime Soda, and Grenadine (Quick & Easy!) | Design Eat Repeat

Thanks to all who linked up! Grab a button if you were featured :)
 
Featured on My Girlish Whims
 
Now... onto this weeks party!

I show off my girlish whims weekly on my blog, and now I want to see yours with 
Your Whims Wednesday!

Guidlines:
1. Link up as many projects as you would like: as long as it is one of your girly ways, you can link it! I'd love to see crafts, recipes, style posts, etc. Anything and everything feminine :)
2.Please add my button (code at the top of this post) to either your blog post or somewhere on your blog. 
3. Take a quick moment to comment on at least one other entry. We we all love comments!! 
4.I'd love if you would follow me as well :)

Sausage Pasta Velveeta Casserole #VelveetaRecipes

I was introduced to Velveeta at a young age.  Growing up we would have tacos about once a week and my mom used Velveeta for the cheese sauce.  My siblings and I LOVED to be able to lick out the Velveeta bowl - so much so that we had to rotate who's turn it was.  Man, it was a good night if it was your night to lick out the Velveeta bow at our house!!!

I still enjoy putting Velveeta on my tacos, but have also found more recipes to use Velveeta in now that I'm all grown up and cooking for hubby and I :)

Today I'm Sharing:

Sausage Pasta Velveeta Casserole

Yum! This is an easy and yummy meal to make. The secret ingredient? Liquid Gold:

Ingredients:
-Velveeta Original 2 lb Loaf
-Three Potatoes
-8 oz Rotini Pasta 
-Five Sausage Links
-4 Tbs Butter
-2 Cups Milk
-1/2 Cup Cheddar Cheese 
-Paprika
-Salt and Pepper to Taste

Steps:

Preheat oven to 350 degrees.  Start two pots of water. Peel and dice potatoes

When water boils, add in potatoes to one pot and pasta to another pot.  Cook sausage links until done.

Combine all ingredients into a casserole dish.

 Use half of the 2lb Velveeta loaf, cut into cubes.

 Combine Velveeta, milk, butter, and salt and pepper.  Whisk until melted.

 Pour cheese on top of casserole and mix.

Top with cheddar cheese and paprika.

Bake at 350 for 25-35 minutes, until cheese is browned.

Serve immediately. Yum!

The trick to this casserole is if you are pressed for time in the evenings, you can prepare the pasta, potatoes and sausage beforehand.  I cooked those ingredients in the morning before work, put them into the casserole dish, and then put into the fridge.  When I came home I made the cheese sauce, combined, and baked. Easy!  You don't have to just use sausage for this recipe either.  Ground beef, chicken, or even hot dogs could be good too! It also reheats well: I had it for lunch the next day and it was delicious!

Now if this recipe has you drooling for some more Velveeta goodness, be sure to check out Velveeta on Facebook for more recipes! You can also read about my shopping experience for Velveeta here!

Bling It On! With Hpnotiq: Enter Your Glam Nails For A Chance To Win

 
  Disclosure: This is a sponsored post for Hpnotiq: all opinions are my own!

I'm back to share information on another fun contest with Hpnotiq! Love glam things? From now until July 28th 2013, Hpnotiq wants you to show them how you GLAM LOUDER to win fab prizes! Hpnotiq is hosting 2-week challenges where you can submit photos in different categories to win - including the glammest heels, nails, makeup and overall look.

 
So here's what you really want to know: the prizes!!! Here are the glamorous prizes that are up for grabs: One year of manis/pedis worth up to $1,200, a $1,000 gift card to Sephora or Ulta, AND a chance to win the grand prize trip for you and three friends to go shopping with a celebrity in Los Angeles! Even better - the grand prize winner will star in a professional photo shoot for the chance to be in a real Hpnotiq Ad! 

The current challenge that Hpnotiq is hosting is for the Glammest Nails!

Here's my entry:


Now, I know I'm no professional when it comes to painting nails, but mine are never painted so putting on this pretty burgundy color certainly glammed my nails up more than normal! I keep starring at my pretty fingers as I type this!

If you want to enter your own GLAM nail photo, hurry and do so before 11:59:59 a.m. EST on June 30th! For this challenge Hpnotiq wants you to show them the glammest nails, nail art or nail finish that you’ve ever seen or done. Think you can nail it? You can enter as many times as you want! Snap a pic of your own, or find a pic online. 

To enter visit http://9nl.it/irby/, or visit Hpnotiq’s Facebook page OR follow @Hpnotiq on twitter and tweet them your picture using the hashtag #GLAMLOUDER. Read full contest rules HERE!

Your Whims Wednesday #116 {And Features}

Time for another Your Whims Wednesday Party!

Your Whims Wednesday

Here are some of my favorites from last week!

Strawberry Lemonade Cupcakes by Blahnik Baker
strawberry lemonade cupcakes

Welcome Pallet Sign by Home Happy Home


Purse and Dress Cookies by Let's Pour Tear


DIY Potted Planters by Southern Scraps


Thanks to all who linked up! Grab a button if you were featured :)
 
Featured on My Girlish Whims
 
Now... onto this weeks party!

I show off my girlish whims weekly on my blog, and now I want to see yours with 
Your Whims Wednesday!

Guidlines:
1. Link up as many projects as you would like: as long as it is one of your girly ways, you can link it! I'd love to see crafts, recipes, style posts, etc. Anything and everything feminine :)
2.Please add my button (code at the top of this post) to either your blog post or somewhere on your blog. 
3. Take a quick moment to comment on at least one other entry. We we all love comments!! 
4.I'd love if you would follow me as well :)

DIY Necklace with Mod Melts

This is a sponsored post with the Blue Print Social.  All thoughts and opinions are my own.

Have you guys seen the newest craft supplies by Mod Podge? Mod Podge Mod Melts are just hitting craft store and they are FUN to play with!

For this project I stuck with something I know well - jewelry making! Today I'm going to show you how to make this cute necklace using this fun new craft!

To make Mod Melts you need Mod Molds and the Mod Melts.

You will also need a MINI high temp glue gun.  Before this project I didn't have one, but I was able to find one at Walmart for less than three bucks which I thought was pretty dang cheap.

To make the Mod Melts, stick a piece of the Mod Melt into your glue gun, let it heat up, and then fill up the mold with the melted mixture.

This was my first tray - it's really easy!  I didn't fill it up perfectly but most of the flowers came out fine!

 Let each Mod Melt sit for 10 minutes and then they will easily pop out of the mold.  There may be some excess strings, but I was able to get rid of them just by using my fingernails to pull them off.

For my necklace I decided to use these cute little flower clusters:

 I painted them a nice color of brassy/gold using Martha Stewart gilding.

My best tip for painting the Mod Melts is to be careful to not put TOO much paint on them because then you might loose some of the detail on the flowers. 

To turn these melts into something I could use with jewelry,  I flipped them over to the back and used some E-600 glue to add jump rings to either side of the flowers.


Let the glue dry for awhile, and then you are ready to use them to make pretty jewelry! I used smaller jump rings  to attach the flowers together.

Like so:

And then just added chain and a clasp on using jump rings as well!

Didn't it turn out pretty? There are SO many different options for cute jewelry to make with all the different Mod Melts available! 

You could even make this necklace entirley out of the flowers and leave off the chain. 

Another easy idea would be to add a jump ring to the top of one of the other types of flowers so you could connect an ear wire to it and make earrings! I just thought of that.  I think I'll have to give that a go next time I'm in my craft room :)

And of course there is so much you could do with the Mod Melts besides make jewelry: check out some of these other fun projects from other bloggers for some more inspiration!


For even more inspiration check out Plaid crafts on facebook, twitter, pinterest, and their blog!


'll be linking up to these parties: