DIY Red Statement Necklace

So... you guys sick of jewelry tutorials yet? I have some things keeping me busy at home currently so my crafting time has been --- zilp. Thus I'm working through my stash of phototurials I've done of jewelry projects but not posted yet! (PST! This next project is for sale in my etsy shop!) So next on the agenda is...

DIY Red Statement Necklace


I bought these red beads from a bead show just knowing they could be PERFECT for some kind of bib statement necklace. It took me awhile to play around with the beads enough to be able to get a design that would suit them well but I finally settled on this and just love how it turned out!

Supplies
 Supplies needed are oval beads, chain, head pins, eye pins, a clasp and jump rings, as well as needle nose pliers, round nose pliers, and wire cutters. Since I got my beads from a bead show I don't have anywhere to link back for them...but I found some similar ones for good prices on Amazon (check out this fun widget!!):


Steps
First step is to make a simple loop with a head pin for the bottom bead of each of the strands that we will connect to the necklace. I had seven individual strands.

Next step is to connect the loop of the bottom bead unto an eye pin using needle nose pliers. Squeeze shut that loop and then make another simple loop on the other side of the bead.

Repeat for each of your strands like so:

Attach the top lop of each strand onto a piece of chain equal distance apart.

Next, use a jump ring to attach a clasp to your chain.

All hooked together.

Here's the completed bib:

I love this necklace! It gives such a great POP of COLOR!

 Oh so sauuuvayyy,

I think this would look great on a formal strapless dress or just on top of a solid top or some stripes to make a your outfit pop!

See? Statement necklaces are not so hard to make! After I came up with the design this necklace came together very quick. Have fun experimenting!

I'll be linking up to these parties:
 
This post sponsored by:
Your #1 Source for Retail and Wholesale Fashion Jewelry and Accessories Starting from .99 Cents!
www.HypeandFashion.com

Your Whims Wednesday #100 {And Features}

Holey Moley! It's the 

100th Edition

of Your Whims Wednesday!

Your Whims Wednesday


Thank you so much to everyone who links up with me each week! I always enjoy going through the links, picking out favorites, and learning new things!!!

Here are some of my favorites from last week!

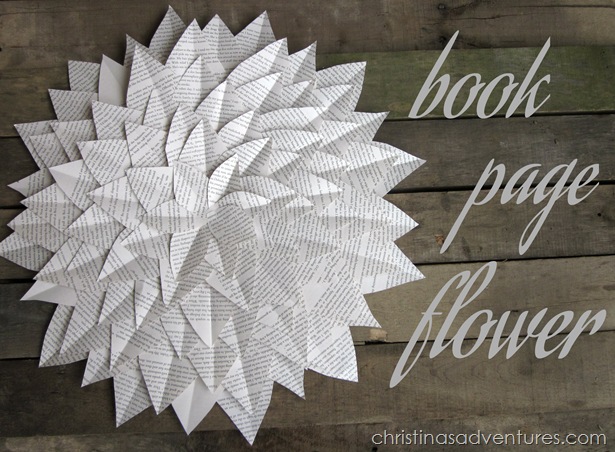
Book Page Flower by Christina's Adventures
bookpageflower

Bow Garland by R & R Workshop


Vinyl Storage by by Thrifty Crafty Girl

DIY Cherry Blossom Branches by Posed Perfection
 
Thanks to all who linked up! Grab a button if you were featured :)

Featured on My Girlish Whims

Now... onto this weeks party!

I show off my girlish whims weekly on my blog, and now I want to see yours with 
Your Whims Wednesday!

Guidlines:
1. Link up as many projects as you would like: as long as it is one of your girly ways, you can link it! I'd love to see crafts, recipes, style posts, etc. Anything and everything feminine :)
2.Please add my button (code at the top of this post) to either your blog post or somewhere on your blog. 
3. Take a quick moment to comment on at least one other entry. We we all love comments!! 
4.I'd love if you would follow me as well :)


The post sponsored by:
Sunrise Image offers a unique and wide-ranging collection of thoughtful gifts for every occasion. 
In the online gift shop you will find something for everyone – from modern decorative items to old-fashioned toys for the kids. 

One Year Ago Today

 There was some of this happening.

And then a little of these

Definitely a lot of these

A good amount of this

And a little bit of this as well :)

Happy Anniversary my love, my partner, my husband. February 25th 2012 was the best day of my life. I am so happy I get to share my life with you everyday. We live simply but love a lot, and that is all I could ask for. Here's to 79 more Anniversaries!!!!

The One with Way too Many Pictures of my Dog

So, if you missed THIS POST Hubby and I added a new member to our family a little bit ago.

He's a four month old goldendoodle named Jefferson and oh has he captured my heart :)

I just thought I'd share a few more pictures of him SINCE HE'S SO DANG CUTE!!!

These are all cell phone pics, so excuse the crappy quality!

So handsome with his little folded paws
 

He loves snoozing on the couch with us on weekends

Hubby and Jefferson napping. (I do not have the napping skill in me) Jealous!!
 

Snuggling on hubby

We also spoil him and snuggle him before bed (I posted this on instagram with hastag #notmyhairyboob ...just in case there were any questions...) Just look at that face!

As a puppy he is still SUCH a little trouble maker. Just take this little gem-of-a-picture: he was being too quiet so I investigated and found him in the laundry room eating his food bag!! Guilty!

He also has a thing for paper product. Ugh.

 This picture is just from this morning. Just hanging out in hub's beanie.

He's gotten so big already! Look at this body:

I wanted him to stay his puppy size forever!

Oh well, he's still adorable :) Still has a long way to go with training, but at least there has MOSTLY been less poop & pee on my carpets as of late. 

To stay up to date with all of my puppy pics, follow me on instagram with username mygirlishwhims.

This post sponsored by:
A fun new party plan company that lets you create custom scented bath & body products. Bottles are labeled with your scent recipe and custom text so, MíA Bath & Body products make the perfect gift.

Chunky Yellow Bead & Chain Necklace

I've got another fun jewelry tutorial for you all today with supplies from Prima Beads! I LOVE this website because they offer free shipping, which most bead sites do NOT offer.  It kills me to pay $3+ for shipping for tiny beads!! Here's the pretty necklace I came up with to share:

I do NOT wear yellow (looks horrible on me) hence I don't normally buy yellow beads! But for some reason these yellow beads just CALLED to me online so I had to order them. I'm so glad that I did because they made such a pretty necklace!


SUPPLIES:
The two most important supplies are the big beads and chain. Here are the direct links to Prima Bead for them. They are great prices too: $3.75 for the beads and $4.00 for the chain!


15pc Acrylic Facet Oval - Jewelry Basics Acrylic
18in Double Oval Chain An Gold - Jewelry Basics Chain

18in Double Oval Chain An Gold - Jewelry Basics Chain 
Besides the beads and chain you will also need spacer beads, beading wire, crimp beads, jump rings, a clasp, as well as needle nose pliers and wire cutters. You can find all of these online at Prima Bead or at a local craft store.

STEPS:

First step is to cut a piece of beading wire with wire cutters to string the beaded part of the necklace on.

Next, attach a jump ring to the end of the chain (If you use a chain that only has one link on the end, you can skip this step.  However my chain has two links on it so I used a jump ring so I could crimp my wire onto a stable surface!)

Next, use a crimp bead to attach the beading wire to the jump ring.

String on the beads! I alternated small/big bead and put a metal spacer bead in between.

Add a jump ring onto the other side and crimp the other side of the beading wire to it.  Use your wire cutters to trim excess wire.

 Now all that is left is to add the clasp! Find the center of the chain on the other side of the necklace and cut a link using wire cutters.

Use jump rings to attach a toggle clasp. Make sure your metals match better than mine do. Hey, the clasp is in the back, no one will ever see it!!! :)

Complete! Look at these pretty beads!! (Maybe just a true jewelry making nut oggles over beads like I do!!)

I love the chunky chain against the chunky beads.

I'm so glad you came into my life little yellow beads :) Now...for everyone who CAN wear yellow...this necklace is available for sale in my etsy shop.!

Happy Beading!

I'll be linking up to these parties: