Tatertots and Jello Feature

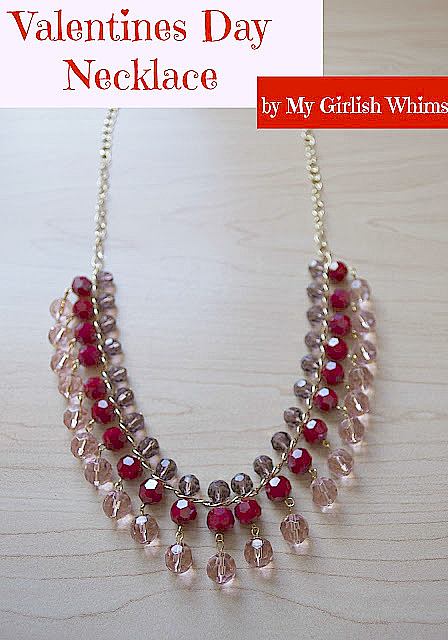
Hello everyone!! Just wanted to stop in to let you know that today I'm guest posting over at Tatertots and Jello for how to make this fun Valentines Day Necklace


For anyone new stopping by from Jen's blog, welcome!

If you are interested in learning jewelry making, it's my favorite craft so I have a lot of tutorials!!!

Check out my Jewelry Lessons series for basic techniques for beginners

And here are some of my favorite jewelry project tutorials:

Anthropologie Knock-Off Earrings


 Ribbon and Pearl Necklace


DIY Cobalt Blue Cluster Necklace


Chunky Black Statement Necklace


Pearl Cluster Chain Necklace


Anthro Knock-Off Earrings 


I also make my jewelry and sell it in my etsy shop, Your Girlish Whims, so if you like my stuff but don't feel brave enough to make it yourself, check it out here!!


PSST!! I also have a giveaway going on right now for my two year blogiversary for etsy store credit! You can enter here!

Your Whims Wednesday #94 {And Features}

Time for another Your Whims Wednesday party!

Your Whims Wednesday


Here are some of my favorites from last week!

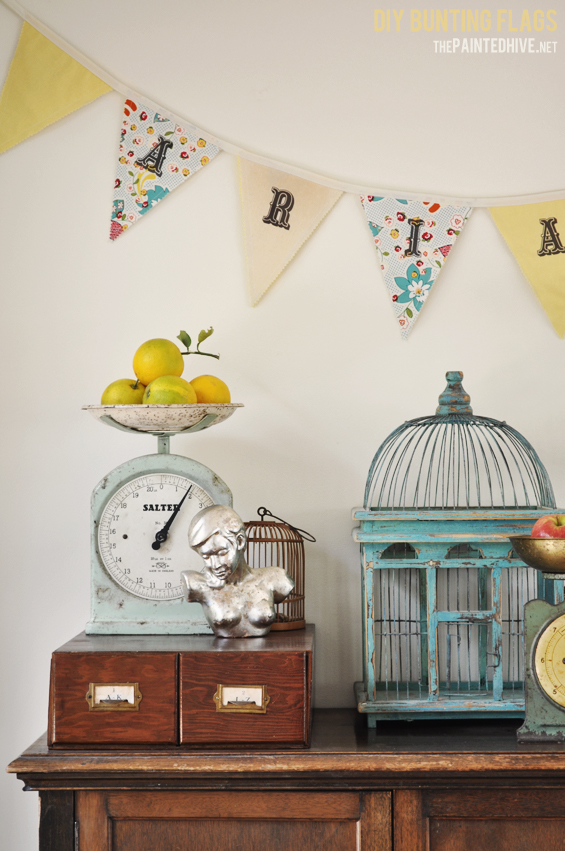
DIY Bunting Flags by The Painted Hive
DIY Fabric Bunting Flags

Winter Leggings by Etcetorize


Fringe Necklace Tutorial by The Gingerbread Blog


10 Minute Chain Necklace by Projects Around the House
Easy 10 minute diy necklace

Thanks to all who linked up! Grab a button if you were featured :)

Featured on My Girlish Whims

Now... onto this weeks party!

I show off my girlish whims weekly on my blog, and now I want to see yours with 
Your Whims Wednesday!

Guidlines:
1. Link up as many projects as you would like: as long as it is one of your girly ways, you can link it! I'd love to see crafts, recipes, style posts, etc. Anything and everything feminine :)
2.Please add my button (code at the top of this post) to either your blog post or somewhere on your blog. 
3. Take a quick moment to comment on at least one other entry. We we all love comments!! 
4.I'd love if you would follow me as well :)


The post sponsored by:

Our New Puppy

Meet Jefferson

He's a medium sized Golden Doodle

He was breed with a Golden Retriever and 18-pound poodle and should grow up to be about 30-40 pounds

He's a little over two months old...

AND THE CUTEST PUPPY IN THE WHOLE WORLD AND HE'S ALL OURS!!!

He's pretty snuggly :)

And a little bit of a daddy's boy...

Because sometimes mommy can't stand that he pees and poops on the floor 5 times a day and gets into EVERYTHING and eats socks and rocks and tissues and jackets and EVERYTHING

But...when he falls asleep under our coffee table...

And then someone pulls him halfway out and he just keeps on sleeping...

It's hard not to love him. Especially when he looks this adorable hanging out in the back of hubby's jeep with hubby's brother..

Yes, I do love you very much little Jefferson :)

It's nice feeling like hubby and I have a little family now :) I think it's going to keep me from wanted to get pregnant for longer, LOL!


This post sponsored by:
Decorate your space with independent artwork. Photo.Artful depicts the beautiful San Francisco Bay Area region of California--nature and urban scenery.

Chunky Black Statement Necklace DIY

I'm back with another jewelry tutorial! You guys sick of these yet? Hope not because I've got a lot more in the pipelines still!

This statement necklace is really simple to make. And it's really not very time consuming either (some of you got scared off by the 57 simple loops you had to make in my cobalt blue cluster necklace!!)You can whip this one up in one episode of Project Runway All Stars. Or Top Chef. Or even one full Honey Boo Boo (a dolla makes me holla honey boo boo.) I digress.

And, as always, if you are not into making jewelry, this is available in my etsy shop!

Here's what you need to make it: chunky chain (I got mine from Michaels), head pins,  large jump rings, a clasp, pendant beads, round beads, and needle nose pliers, round nose pliers, and wire cutters. This necklace was really inspired by the chunky crystal pendants I found at a local bead show. For a more subtle necklace, just substitute some smaller pendants.

First thing to do is open a jump ring and push it through the top of the pendant beads. This may take a little manipulating of the jump ring to get it through all the way and that's ok - just make sure you bend the jump ring back into a circle at the top part after it's through so it will close fully.

Grab some round beads (I used 8mm stone beads) and put them on head pins and make a simple loop

Cut two lengths of chain in your desired lengths for the necklace. On the shortest one attach the round beads to the chain using needle nose pliers to squeeze the simple loop shut.

On the longest piece of chain attach the pendant beads and use needle nose pliers again to squeeze the jump rings shut.

Connect both sides of the chain in the back of the necklace with a jump ring that is also attached to a clasp.


 And that's it!

I love the chunky chain and the chunky pendants - a great necklace to wear with a simple dress or a simple necklace to jazz it up a bit!

Happy jewelry making!

I'll be linking up to these parties:

This post sponsored by:
Trivia Party Starters makes fun themed cocktail napkins (20 different napkins per pack) to get the conversation and the party started. Wine Trivia, Girl's Night Out Trivia, Celebrity Trivia, Christmas Trivia, TV Sitcom Trivia,Kids Trivia, Sports Trivia and more. Order online at www.triviapartystarters.com

Your Whims Wednesday #93 {And Features}

Time for another Your Whims Wednesday party!

Your Whims Wednesday


Here are some of my favorites from last week!

Scarlet's Room Tour by Lauren Rebecca


Powder Room Makeover by Mandy Jean Chic


Draped Chain Necklace by Cat on a Limb
Cat on a Limb--2.jpg

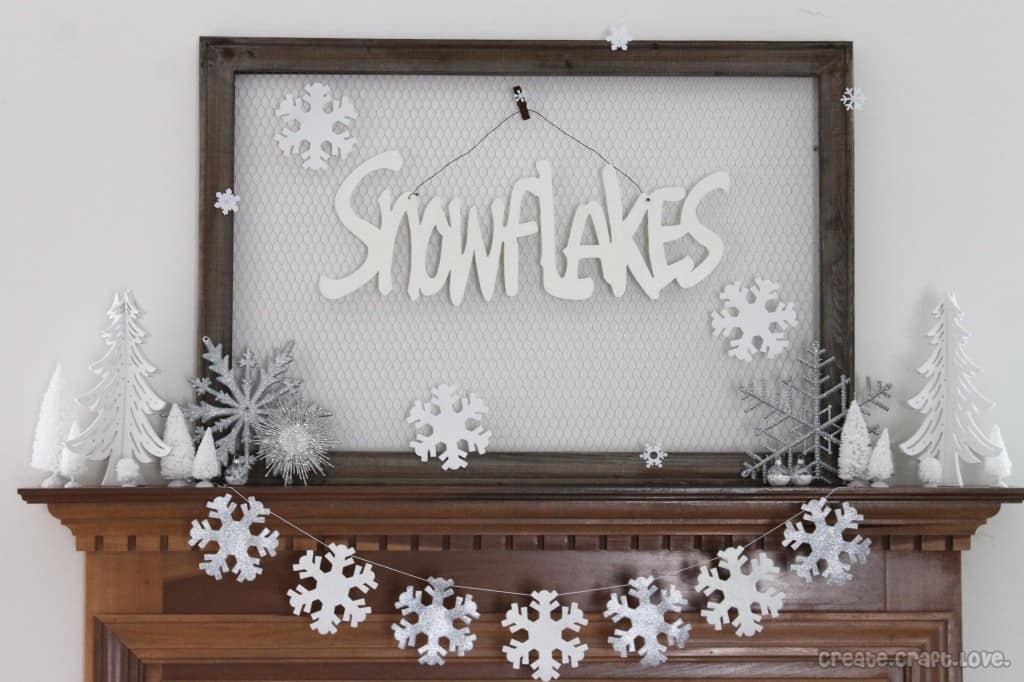
Winter Mantel by Create Craft Love
Winter Mantel

Thanks to all who linked up! Grab a button if you were featured :)

Featured on My Girlish Whims

Now... onto this weeks party!

I show off my girlish whims weekly on my blog, and now I want to see yours with 
Your Whims Wednesday!

Guidlines:
1. Link up as many projects as you would like: as long as it is one of your girly ways, you can link it! I'd love to see crafts, recipes, style posts, etc. Anything and everything feminine :)
2.Please add my button (code at the top of this post) to either your blog post or somewhere on your blog. 
3. Take a quick moment to comment on at least one other entry. We we all love comments!! 
4.I'd love if you would follow me as well :)


The post sponsored by: 
Learn how to make beautiful candy centerpieces. Free how to tutorials at http://ediblecraftsonline.com/candy_bouquets/index.htm