Spring Flower and Burlap Wreath

Well the calendar is telling me that it is officially spring time...but I'm a little skeptical still. At least we haven't had any more snow recently but our weather here in Eastern PA has been all over the place.  It's currently POURING outside but I'll take the rain over snow any day.  Hopefully all this rain will lead to some pretty spring flowers popping up pretty soon!

In anticipation of some pretty spring flowers blooming in the coming month I decided to make a colorful flower wreath to put on display!

I also really needed to make something to replace my winter shelf decorations I've had up since about oh, a week ago.  Whoops! Oh well. Christmas was ONLY three months ago now :) 

I just love how colorful the flowers are on the wreath. It sure puts me in a springy mood even if it is still cold and rainy out there!!

To make my wreath I grabbed a green Styrofoam wreath form for the base.  Since I was planning on wrapping it in burlap I painted it white so no green would show through.

After my paint was dry I wrapped my wreath form with these light burlap fabric strips I got from Michaels and used hot glue to keep it in place.

All wrapped up and ready to get pretty!

To decorate the wreath I made two flowers using this technique using blue burlap strips I also got at Michaels.

 And then I picked up a selection of pre-made flowers from Michaels to fill up the rest of the space.  Cheating a little bit? Ahhh well. They are so cute and saved me time! :)

 I arranged my flowers onto the wreath and then hot glued them in place.

Here's my finished product!

I hung my wreath up on an old window pane I keep on floating shelves in my family room.  I also added in two cute little birdies I got from Michaels. No more winter trees in sight!

Now I feel caught up with my decor and ready for the week - maybe it will feel more like spring this week. This weekend hubby and I went out wine tasting to some local wineries. We normally go a few times during the year but generally in the warmer months so it feels nice to be "coming alive" somewhat and getting out and about more.  We don't have too many exciting plans for the rest of April but if we have to be stuck inside more at least now I'll have a pretty spring wreath to look at as I wait for spring!!!

16 DIY Crystal Jewelry Projects


Crystals have always been one of my favorite types of beads to craft with.  Every girl loves to have a little sparkle with their outfit, right??? Crystals come in TONS of different shapes, sizes and colors and I have fun mixing and matching different kinds of crystals to come up with new projects. I like to mix crystals in with other types of beads a lot as well, but sometimes a full on CRYSTAL necklace makes a fun and eye-catching statement piece! If you are a love of all things sparkle and jewelry related, I've rounded up 16 jewelry DIY projects that feature lots of sparkle. I hope you find some inspiration - happy beading!

DIY Silver Sparkle Necklace by My Girlish Whims

Crystal Chandelier Earrings by Happy Hour Projects
Simple Chandelier Earring Tutorial at www.happyhourprojects.com

Crystal Wire-Wrapped Earrings by My Girlish Whims
 

Crystal Memory Wire Bracelet by Cook Love Craft
 
Crystal Tassel Bracelets by Quiet Lion Creations
Florida Inspired Crystal Necklace by My Girlish Whims
 

Crystal and Chain Necklace by Glitter Guide


Crystal Dangle Earrings by Hello Whimsey 


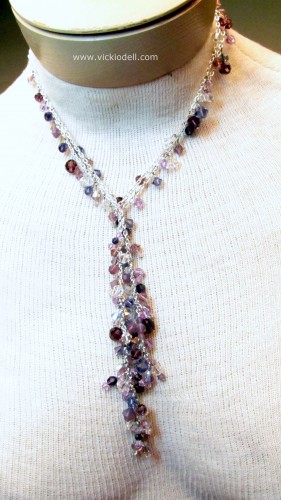
Dressy Crystal Lariat by Vicki O'Dell
Dressy Lariat with Swarovski Crystals


Basic Crystal Earrings by My Girlish Whims

Francesca Bracelet by Prima Bead
Francesca Bracelet
 

Sia Necklace by Cousin Corporation
Sia Necklace

Crystal Ombre Earrings by Quiet Lion Creations


Golden Globes Inspired Necklace by The Impatient Crafter


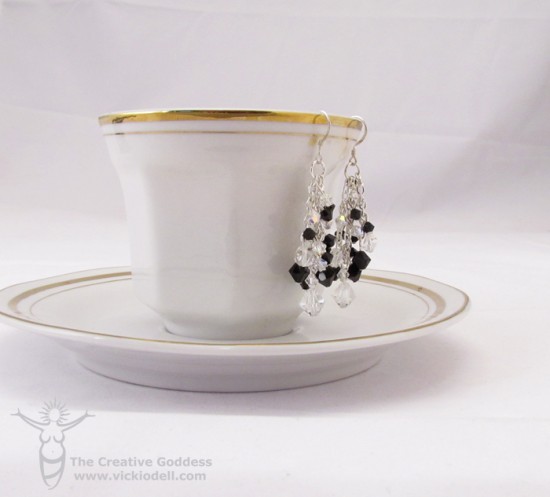
Crystal and Chain Earrings by Vicki O'Dell
Easy to Make Chain and Crystal Earrings

Your Whims Wednesday #155 {And Features}

Time for another Your Whims Wednesday Party!

Your Whims Wednesday

Just realized this is my first post since I posted my link up last week. Whoops! I'm currently working on a bigger/time consuming necklace project so I might not have a project up until I get that done!! I also thought about doing another weight loss update because I hit 20 pounds lost (!!!) but then the weekend came and I did bad and now I'm not quite back down to 20 pounds.  :( Ugh. If everyday was a weekday I sure would eat a lot better but wouldn't get any crafting done that's for sure!! Oh well.  I'll have a jewelry round-up later this week but for now...

Here are some of my favorites from the last party!

Lemon Curd and Raspberry Cupcakes by Scattered Thoughts of a Crafty Mom
Lemon Curd and Raspberry Mini- Cupcakes

Twine Beach Sign by Holy Craft


Hot Fudge Brownie Cheesecake by Life with the Crust Cut Off
Hot Fudge Brownie Cheesecake

Knotted Lantern by Quinton Wench
quintonwench.com

Thanks to all who linked up! Grab a button if you were featured :)
 
Featured on My Girlish Whims
 
Now... onto this weeks party!

I show off my girlish whims weekly on my blog, and now I want to see yours with 
Your Whims Wednesday!

Guidlines:
1. Link up as many projects as you would like: as long as it is one of your girly ways, you can link it! I'd love to see crafts, recipes, style posts, etc. Anything and everything feminine :)
2.Please add my button (code at the top of this post) to either your blog post or somewhere on your blog. 
3. Take a quick moment to comment on at least one other entry. We we all love comments!! 
4.I'd love if you would follow me as well :)


Your Whims Wednesday #154 {And Features}

Time for another Your Whims Wednesday Party!

Your Whims Wednesday

Here are some of my favorites from the last party:

Rock Crystal Macrame Bracelets by Loose Ends

Golden Pencils by The DIY Dreamer
Gold Pencils - and many more gold projects

Guest Bathroom Redo by Young and Crafty Sisters
Guest Bathroom Redo

Wire Wrapped Chandelier Earrings by Everyday Bijoux


Thanks to all who linked up! Grab a button if you were featured :)
 
Featured on My Girlish Whims
 
Now... onto this weeks party!

I show off my girlish whims weekly on my blog, and now I want to see yours with 
Your Whims Wednesday!

Guidlines:
1. Link up as many projects as you would like: as long as it is one of your girly ways, you can link it! I'd love to see crafts, recipes, style posts, etc. Anything and everything feminine :)
2.Please add my button (code at the top of this post) to either your blog post or somewhere on your blog. 
3. Take a quick moment to comment on at least one other entry. We we all love comments!! 
4.I'd love if you would follow me as well :)


DIY Wire Wrapped Rhinestone Leather Bracelet

I'm not a big bracelet wearer.  I have big wrists so most bracelets in the stores don't fit me so I don't ever buy myself bracelets. I also find them kind of annoying to wear - in school they would always get in the way of writing notes all day and now at work they clank on my desk all day. Not the most convenient accessory in my opinion!

Even if they aren't convenient, I suppose there are some pretty cute bracelets out there.  I've seen a lot of rhinestone bracelets recently so I thought I would put my own spin on the style with this Wire Wrapped Rhinestone Leather Bracelet!


And so even though I think they are annoying to wear, I do really love how this bracelet turned out so I think I can make an exception to wear this one out!

Supplies
To make this bracelet you will need: leather bracelet base, metal clasp endcaps, rhinestone chain24 gauge wire and E-600 glue.

Steps:
The first step is to attach one end of the clasp to the leather band using E-600 glue. 

Let dry for about 10 minutes

Then cut a LONG piece of wire and wire wrap a few wraps around the base of the clasp

Lay your rhinestone chain on top of the leather band. Wire-wrap two times around each rhinestone. You can use scotch tape to help hold the chain along the leather as you work your way down the bracelet.

After you are almost at the end of the leather cut the rhinestone chain and wire-wrap a few times to finish off the wire strand.  Use more E-600 glue to attach the other end of the metal clasp.

My biggest tip? Don't cut the rhinestone chain to size until you are VERY close to the end of the leather bracelet. I laid my chain out before I started wrapping and cut it to the size of the leather (or so I thought) and then I guess it shrunk up as I wrapped and ended up short. So hence if you look closely you can see the gap at the end of my bracelet. Whoops!!! 

But that's the nice thing about messing up near the end of a bracelet, just flip it around to the front and it's harder to notice ;)

Even though I've got massive wrists I still like how it looks on.  Seriously though, my wrists are like my least feminine feature.  I think I need to get a hand model.

All large bones aside, this bracelet is easy to make no matter how large or small your wrist is. You can cut the leather bracelet form smaller if needed with a sharp pair of scissors. Also, don't be afraid of the wire wrapping: it's about the easiest form of wire wrapping there is!!

Anyone else out there not the biggest bracelet fan? Hopefully this will be a fun project to try and change how you feel about them just a little bit at least!