My Love Affair with Costco Camis

Let me introduce you to...a little piece of clothes-wearing heaven


Costco Camis. OH MY GOSH THESE THINGS ARE THE BEST AND HERE IS WHY:

1. They are LONG. Perfect for under shirts that are just a little too short so no buttage ever becomes vieawble.
2. They are SMOOTH. I wear them under almost everything I wear to prevent bra lines and to just smooth everything out.
3. They prevent valleys. I'll be honest. My ta-tas are big. And, as a personal preference, I don't like the whole mountain-valley-mountain look that comes with certain shirts. The built in bra helps to eliminate that.
4. They are COMFY. Real life: everyday I get home from work and don't have to go out again I change into yoga pants and one of these camis. Because, you know, I like to be "free," but with these size ta-tas, I need SOMETHING reeling 'um in.
5. They are CHEAP. I forget how much exactly it is for a pack, but it's not more than $6 a cami. And these delicious pieces of fabric are worth each of those bucks.

Fact: My cami obsession may or may not have over-taken a whole drawer in my dresser. Oh look! Color coordination how pretty :)

I have tried many a brand of camis, but these simple ones from Costco are my favorite. 

I think I need a few more colors still. helpmeimaddicted

This post sponsored by:
SilverSource Wholesale Silver Jewelry sells wholesale 925 sterling silver rings and earrings with natural gemstones. Sterling purity guaranteed.

Your Whims Wednesday #78 {And Features}

Time for another Your Whims Wednesday party!

Your Whims Wednesday


Sorry if any of you were getting warnings when trying to access my site last week...my site got labeled as harmful by google for some reason! But thanks to a helpful techy husband, everything is fixed now!

Here are some of my favorites from last week:

 Fabric Pumpkins from Scattered Thoughts of a Crafty Mom

Fabric and Twine Pumpkins by Sweet Bee Buzzings

Jewelry Organization by Three Kendrick Blessings

Blue and Green Drop Necklace by Projects Around the House
DIY drop necklace

Thanks to all who linked up! Grab a button if you were featured :)

Featured on My Girlish Whims

Now... onto this weeks party!

I show off my girlish whims weekly on my blog, and now I want to see yours with 
Your Whims Wednesday!

Guidlines:
1. Link up as many projects as you would like: as long as it is one of your girly ways, you can link it! I'd love to see crafts, recipes, style posts, etc. Anything and everything feminine :)
2.Please add my button (code at the top of this post) to either your blog post or somewhere on your blog. 
3. Take a quick moment to comment on at least one other entry. We we all love comments!! 
4.I'd love if you would follow me as well :)


This post sponsored by:
Jewellery Making Online
 Jewellery making membership site with hundreds of stunning, easy to follow, step by step projects plus a free ebook on joining. 

Fall Leaf Wreath

 After making my first fall wreath for my front door, I was in a wreath making mood! Using supplies from the dollar store I made another mini wreath to display in my family room.

Dollar Store Fall Leaf Wreath


For this mini wreath I used about two packages of fall leaves and a mini wreath form, all from the dollar store. Only other supply you need is some hot glue!


First thing I did was cover the whole wreath with leaves wrapped around the form so none of the wreath form was showing.

To make the wreath look a little more appealing, I then went around and just hot glued leaves to the front of the form.

After I went all the way around the form, my wreath was done!

I hung it on a old window pane on my new shelves in my family room. The reveal of all the shelf decor will be coming soon - now I think I've done a tutorial for all the DIY items I did for them!!

Now that it's officially fall I totally don't feel bad about posting all of my fall project!

I'll be linking up to these parties:

This post sponsored by:
Find out tips on how to get the most for your car when you sell it

It's My Birthday and my Site Got Hacked! Ah!

UPDATE: Problem is fixed!

So, I'm getting some crazy bad things going on with my site...apparently Google has labeled it as harmful all of a sudden? I don't know WHAT is going on but I my techy husband will be working on it this weekend so please bear with me!!!

In other news....today is my Birthday! The big 22

Ok. I guess 22 isn't really a big number. But to me, it sounds much more mature than 21 does, lol!

I had a GREAT 21st year. I knew it was the start of something good when some friends and I went out to dinner for my birthday and my friend Lindsay shyly started off our evening with large margaritas for everyone  :)

21 is the age I graduated college

Got a job and became Realtor


And of course, so much more.  Personally, I think that was all quite a lot to accomplish in one year though!!!

I can't wait to start out on this near year, I love the spot I'm in right now and am looking forward to just being content with life as it is for now :)

This post sponsored by:
Mode Dog
Welcome to Mode Dog, the exclusive online dog boutique! We specialize in boutique quality fancy dog collars and accessories for any and every dog in need of fashion!

Quick and Easy Felt Pumpkin

DIY Felt Pumpkin


The hubs recently installed some shelves in our family room for me to decorate on! I've been working on perfecting the arrangement but wanted to show off this cute pumpkin project that was super easy to make!

 For this project I wanted something that I could craft real easy with supplies I keep on hand. One of my favorite crafting materials is felt and I always have a good selection handy - so I whipped up a cute pumpkin real quick!


First thing I did was cut a circle out of my sheet of felt

I then stitched some lines in it to give it that pumpkin texture...but I realized after I was done it wasn't really necessary, so you can skip this step!

I stitched around the outside of the circle...

And then pulled tight!

Stuff in some fluff...

Insert something as a stem, and stitch it up! I used an extra peg from those wooden frames you get for $1 at Michaels (I don't know why they give you two...) and just painted it brown.
 

 As an afterthought, I cut a little leaf from some green felt and stitched that on as well. So cute!
 

 I realized I didn't need to stitch any texture lines because the gathered felt gives it plenty of texture.

Here it is up on one of my shelves, perfect for fall!

PS- this felt Jack-O-Lantern I made last year will be up there too!


What fast and easy projects are you crafting for fall??

This post sponsored by:
Fittedwardobes.com
Get ideas on wardrobes for your bedroom with fittedwardobes.com 

Your Whims Wednesday #77 {And Features}

Time for another Your Whims Wednesday party!

Your Whims Wednesday


Here are some of my favorites from last week:

Pleated Skirt by Ma Nouvelle Mode

DIY Fall Shabby Pumpkin by Sarah Dawn Designs

DIY Chandelier Earrings by Agape Love Designs

Feathered Wreath by Turtles and Tails

Thanks to all who linked up! Grab a button if you were featured :)

Featured on My Girlish Whims

Now... onto this weeks party!

I show off my girlish whims weekly on my blog, and now I want to see yours with 
Your Whims Wednesday!

Guidlines:
1. Link up as many projects as you would like: as long as it is one of your girly ways, you can link it! I'd love to see crafts, recipes, style posts, etc. Anything and everything feminine :)
2.Please add my button (code at the top of this post) to either your blog post or somewhere on your blog. 
3. Take a quick moment to comment on at least one other entry. We we all love comments!! 
4.I'd love if you would follow me as well :)


This post sponsored by:
Socialbliss is a fabulous community for all things fashion

The Occasional Accessory Review

the occasional accessory
I recently got to test out a necklace from The Occasional Accessory, and I'm so excited to share this cute site with you guys!

I picked out this pretty fuchsia bib necklace

Bib Necklace (Fuchsia)

And here's how I wore it!
Shirt: Shop in France. Skirt: Old Navy. Shoes: Bandelinos. Necklace: c/o The Occasional Accessory

Here's a close up shot:

Isn't it cute?? I love it because it's in trend with the whole bib necklace style that's so in right now. The pink is also very me :)

Best part about it? It retails for only $18!

The Occasional Accessory also has tons of other cute handmade necklaces and other accessories!

Here are some others I liked! (Click on the pics to view)
Ceramic & Aluminium Necklace


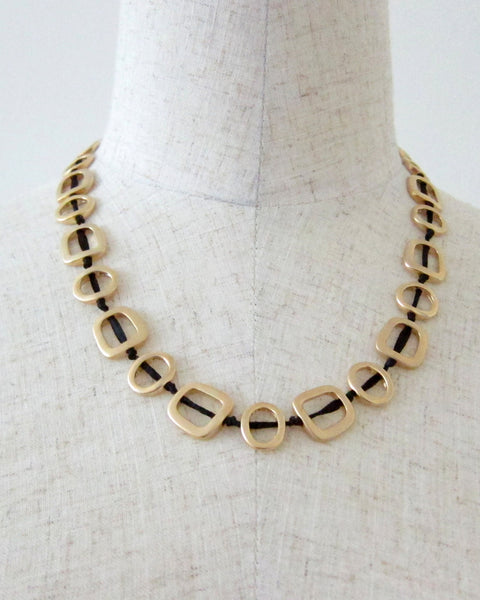
Matte Gold Necklace

Filigree Earrings
Thanks for the cute necklace The Occasional Accessory! You make some great jewelry!

Stenciled Coasters with Martha Stewart Glass Paints


I was so lucky to be able to test some of the new products from the Martha Stewart Glass Paint Line. Opening that box with all those goodies in it...man, craft heaven I tell ya :)

Here's the project that I came up with!

DIY Stenciled Tile Coasters


Hubby and I recently bought our first coffee table together. After shelling out the cash I'm very protective!! I knew some cute coasters would be in order to protect my new furniture. 

I picked up four coasters from Lowes for about 16 cents each I believe. Very cheap!!

I mixed together two colors of the Martha Stewart Gloss glass paint to use for the base of my coasters.

I used the handy little sponge pouncers that come with the line to apply the paint.


After pouncing I used a small foam roller to give it a more even texture.

After a couple coats I had a pretty turquoise base for the coaster to match my decor in our family room :) 

I tested out one of the metallic paints to use on the stencils.

I used another one of the other small foam pouncers to apply the stencil to the coasters.

After I had finished my stencils I popped the coasters in the oven while it was still cool and then baked at 350 (read the instructions on the paint for how long - you want to put them in a cool oven though so they don't heat up too fast and crack!)

After they were done cooking and cooled, I flipped them over and hot glued some felt to the back so they don't scratch my new coffee table!!

As an afterthought, I painted the sides of the coaster the same color of the stencil.

 Tada! All done!

Testing it out with some hard cider - yum!

Here they are on my coffee table - love!

I had so much fun playing with these paints! I know that I will use them for many future projects to come :) 

Follow Plaid, the manufacturer of these crafts online!
Facebook: http://www.facebook.com/InspiredByPlaid  
Twitter: http://www.twitter.com/PlaidCrafts
Pinterest: http://www.pinterest.com/PlaidCrafts

I wrote this post as part of a paid campaign with Martha Stewart Glass Paints and Blueprint Social. The opinions in this post are my own.

Check out some of the other great projects made with the new paint line!
 

I'll be linking up to these parties: