Styling my Jeggings and Tights from No nonsense

This is a Sponsored post written by me on behalf of No nonsense for SocialSpark. All opinions are 100% mine.

I recently got the opportunity to try out some of the NEW No nonsense tights and leggings and I'm so excited to share them with you all

I received two items, the first being these jeggings:

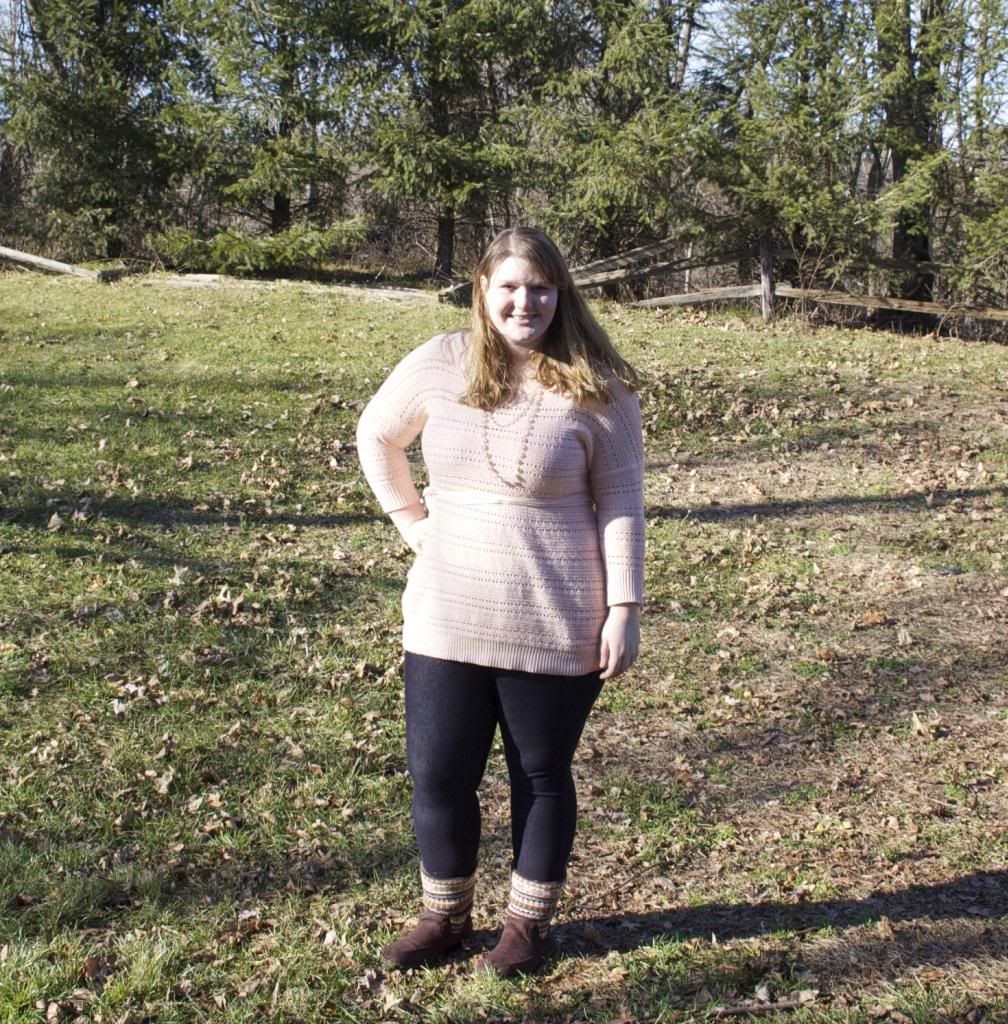
I paired the jeggings with a long, cozy pink sweater from target, a pink necklace from forever 21, and some cozy boots from payless.

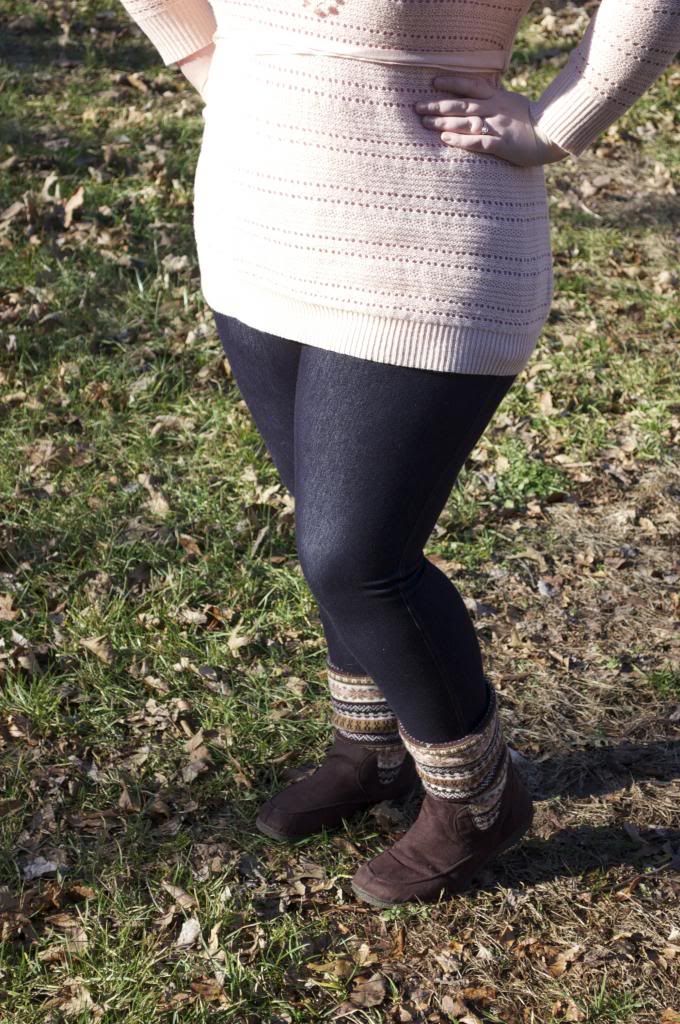
I like the fact that the sweater was long enough to cover my butt (cause lord knows I have a big one!) but I wasn't worried about always pulling it down because the jeggings were very opaque and had great coverage. They were so comfy too!! I wore this on a Saturday and felt so snuggly all day :)

I also got sent a pair of the No nonsense tights in a smokey gray color. I put together a quick little outfit of how I would style them:

No Nonsense Tights Outfit

Dolman dress
target.com


Silky Opaque Tights
nononsense.com


Isn't it so cute??? I got sent a neutral color tights (gray) but the line has tons of other fun tights colors - you could easy switch the gray for a more colorful pair of tights and add in a few more colorful pieces of jewelry to change the whole look of the outfit! Or even swap out the tights and a more colorfu belt - instant new bright and colorful look! For my look I just picked out a random dress on Polyvore to find that it's only 25 bucks at Target! Score!

And speaking of affordable...the new No nonsense tights and leggings are SUPER affordable. You can easily find them in food and drug stores as well as mass retail stores. There's no need to pay a high price tag for high fashion!

To help spread the word about this fun new line, No nonsense has teamed up with fashion expert Jill Martin. Jill is an Emmy Award-winning TV personailty, a co-author of the New York Times bestselling style guide "I Have Nothing to Wear!" and is the New York Correspondent for Access Hollywood. This lady knows her fashion and she knows No nonsense makes great products!!

Be sure to follow No nonsense on Facebook and on Twitter!

Visit Sponsor's Site

My Subconsious is Afraid of Getting Pregnant

How's that for a title?

Lemme explain. 

Forewarning: This is a funny post not something very introspective!!

Hubby and I have been married for 10 months now. I'm only 22. We both want a family but realistically we think it's a good idea to give it some time. Thus...I'm taking the pill to prevent pregnancy. (If this is TMI for y'all I apologize and feel free to skip the rest!) If a *surprise* happens - miraculously - then we will of course be overjoyed but it is not what we are planning for at the moment.

If a surprise came, I swear would be fine. I want to have kids before hubby does anyway haha. I take my pill at 9:30 every night and I have an alarm set on my phone so I remember it. I carry them around in my purse with me so I always have them and never have missed one. Apparently my subconsious is terrified of me screwing up though.

Exhibit A. Two nights ago I went up to bed while hubby was still playing video games. I fell asleep and about half hour later he came up and said something and startled me awake. In my confused slumber I yelled out:

"WHAT AM I DOING? WHAT AM I DOING? WHAT AM I DOING? DID I TAKE MY MEDICINE?"

Yes. I seriously asked what I was doing three times. And then asked about my pill for good measure too. I don't even remember forming the words it all just popped out hahaha. I woke up a little more then and realized that A- I was sleeping (yes that's what I was doing) and B- yes I had taken my pill at 9:30 like normal. Silly subconscious

Exhibit B. About a month ago I remember bolting awake in the middle of the night thinking "I DIDN'T TAKE MY MEDICINE!" and then frantically  scouring my night stand looking for my pills. The more and more I looked the more upset I got so I woke up hubby and was like "HELP ME FIND MY PILLS THEY'RE NOT HERE!!!! AHH!!!!" and then...I woke up a little more...sat back down in bed and realized: A - I don't keep my pills on my nightstand so that's why you can't find them there.... and B - yes I had taken my pill at 9:30 like normal. So...I grumbled out a whoops never mind to the hubby and eventually went back to bed.

Exhibit C. About TWO months ago I woke up after snoozing like 7 times (like normal) and then sleepily got into the shower. In the middle of lathering my hair with shampoo I suddenly remembered HOLY CRAP last night I woke up in the middle of the night and went downstairs because I thought I had forgotten to take my pill. But in reality...I had taken it at 9:30 like normal!!! Then I got freaked out that I had taken another one or like five because who knows what your mind is thinking when you sleep walk to take your birth control at 3AM.... so after the shower I rushed downstairs to look in my purse. My pills were fine. No extras were taken. Everything else in my purse was fine...except one thing. The night before I had put a fresh pack of gum in my purse (still with the plastic on) and now the wrapper was unwrapped. No gum taken out. Just the package freed from it's plastic barrier. I am guessing that my sleep walking self concious remembered that I HAD in fact taken my medicine like normal...but since I was up I might as well unwrap my gum. Good thinking.

So. Seriously. Three different times. My Subconscious is FREAKED.


This post sponsored by:
One Crafty Mum is run by Amanda: a wife, mother, blogger and now, a keen crafter dabbling in papercrafts, sewing, embroidery, cooking and whatever else she decides to try her hand at. She's One Crafty Mum!

Top 10 Posts of 2012

2012 is almost gone!!!  And what a great time to be able to look back at this lil ole blog of mine from over the past year and see what projects were the biggest hits of the year!

To see my top posts from last year visit THIS post

Here they are....drum roll please!!!

#10 Yarn Wrapped Fall Wreath


#9 Silk Flowers in Paper Cones Pew Wedding Ceremony Decor


#8 Pearl Cluster Chain Necklace


#7 Jewelry Lessons How to Wire Wrap Jewelry Part 2


#6 Chain Necklace Knock Off


#5 Bead Organization: Fabric Covered Magnet Board


4.  Jewelry Lessons: How to Wire Wrap Part 1


3. Jewelry Lessons: How to Make a Simple Loop


2. DIY Wedding Guest Book


 1. Anthropologie Knock-Off  Earrings


 An overwhelming majority of jewelry projects! They're my favorite craft so that's fine by me! Last years number one was also an Anthro earring knock-off. What a coincidence! I did do a pretty sweet job on both of them if I do say so myself :) Thanks for sticking with me and this blog for the past year! Hope to continue to interact with you all well into 2013 :)

This post sponsored by:
 Dedicated Woman appeals to a wide female audience including body and fitness-conscience consumers, consumers of natural, organic, and herbal products, as well as bodybuilders and fitness enthusiasts. We promise to listen to your needs, and provide pure, high-grade products that support your nutritional needs. 

DIY Silver & Gray Charm Necklace


I got some more pretty new beads from my newest favorite online bead supplier: Prima Beads!  Seriously. I used to love Fusion Beads but now they charge for shipping.  I am not a fan of shipping charges when buying beads. Good news is Prima Beads has all free shipping so I can shop for beads and not feel guilty about racking up shipping charges :) With my beads I made this fun and flirty silver/gray tone chain necklace. It's super easy to make!


Supplies:
Here are the direct links to the chain and different beads that I used in this necklace:

Besides the beads you will also need head pins, eye pins, a clasp and jump rings, as well as needle nose pliers, round nose pliers, and wire cutters. 

The first step is to use needle nose pliers to hook an eye pin onto a chain end. Add the largest pearl (I used 8mm) and then form the other end into a loop and connect to another piece of chain. I spaced mine out about 10 chain links each.

Keep cutting pieces of chain and connecting them with pearls until you have the base of the necklace in the length that you desire your finished necklace to be.

To make the charms that will hang from the chain, string a 6mm crystal, 6mm pearl, and 4mm crystal and 4mm pearl onto head pins.

Use needle nose pliers to bend the head pins back 90 degrees directly above the bead

Use wire cutter to snip off excess wire - you only need a short tail

And then use your round nose pliers to bend the tail into a loop

Use needle nose pliers to help hang the beads on the chain, squeezing the loops shut with the pliers after attached.  I hung four beads between each large pearl: 4mms, 6mm pearl, 6mm crystal, and another 6mm pearl

After you are done attaching all the charms, use a jump ring to attach a clasp on the back with pliers. I left my last links of chain in the back bare because I ran out of crystals because I made two necklaces...one for me and one for my etsy shop :)

After the clasp is on, your done!

I made my necklace on the longer side to be able to hang down to complement my tops.


Dainty and pretty - I'm sure I will get a lot of use out of this new necklace (especially since I wear gray like every other day!!!!)

Now to just organize my jewelry so I have somewhere to put this pretty....

I'll be linking up to these parties:

Your Whims Wednesday #91 {And Features}

Time for another Your Whims Wednesday party!

MERRY CHRISTMAS!!! I had a lovely day with family and am enjoying relaxing in my PJs on the couch with hubby before going back to work tomorrow. I'll share some pics on Friday for insta friday or you can just follow me (mygirlishwhims).

Your Whims Wednesday


Back to party business...here are some of my favorites from last week!

Dotty Gift Wrap by Creative Chaos


Starbucks Wreath by The Simple Craft Diaries


Mint Plates by Crafty Mis-Adventures

Winter Bedroom by Inspired Living 


Thanks to all who linked up! Grab a button if you were featured :)

Featured on My Girlish Whims

Now... onto this weeks party!

I show off my girlish whims weekly on my blog, and now I want to see yours with 
Your Whims Wednesday!

Guidlines:
1. Link up as many projects as you would like: as long as it is one of your girly ways, you can link it! I'd love to see crafts, recipes, style posts, etc. Anything and everything feminine :)
2.Please add my button (code at the top of this post) to either your blog post or somewhere on your blog. 
3. Take a quick moment to comment on at least one other entry. We we all love comments!! 
4.I'd love if you would follow me as well :)


The post sponsored by: 
Mandrlimo.com - Limo services in Miami. Book a nice ride for your bachelorette party, anniversary or just to spoil yourself with luxurious ride to a restaurant.

My Christmas Shelves

I've shown bits and pieces after I finished projects, but today I thought I would pop in and show my completely decorated floating shelves for Christmas!!

To complement my wall color, I decided a gold, white, and hints of red theme would work nice. Here they all are:


The focal point is the very pretty pearl wreath I just showed you all how to make yesterday!
I put the wreath on my decorative window. Side note: after I put the window up, later that night it slipped and fell off the shelf!! It fell onto a part of our couch below but one of the window panes broke :( I was so sad because I just bought it in the fall and really like it! Well, hubby was SO sweet and went out and bought new glass and replaced the pane for me. Even thought the window was only 20 bucks to begin with and it almost cost that much to replace the pane haha I am still very glad he fixed it :) That's why the snow is a little faded in the top right pane and why there's a mark on the bottom right one. I ran out of snow spray! But anyway. Before replacing it on the shelf I added some little rubber grips on the bottom so HOPEFULLY it stays put!

I decorated the rest of the shelf with gold glitter candles I got for sale at Michaels after fall (I think they look more like Christmas than fall anyway!) and three little red candles the in-laws got me from a Walmart black Friday special. Three votives and two big candles for 5 bucks!

The white Christmas trees I made with my Silhouette. Cheap, easy and cute decor!

This shelf has my gold mini Christmas trees. I also gathered up some sticks from my back yard and spray painted them (almost) white (I had some terrible luck with the can I bought for some reason???) and stuck them in a vase. The little glitter bell I picked up at the Dollar Tree.

The last little shelf has a cute little mini Christmas tree (Joanns on sale with a 40% coupon!) which I strung a little bell garland on from the Dollar Store. I think the garland looks a little sad...maybe next year I'll make some mini ornaments :)  The gold star was also from the Dollar Tree. I think it was supposed to be an ornament but I think it works great on a shelf too!

And that's all of them! Little things like pretty decorated Christmas shelves sure do make me happy!! Anyone else? :)

This post sponsored by:
An online hosiery shop with worldwide shipping. All items Made in Italy