Where to Buy Cousin Beads

So, I'm sure you've noticed by now that I'm so happy to be a brand ambassador for Cousin Corporation. I talk about Cousin a lot because they are a major jewelry manufacturor and I have LOVED working with them. But, I've thought to myself...what if all of my readers don't really know who Cousin is? So, i've decided to show you where exactly I buy my Cousin beads and what they look like - you might be buying Cousin products and not even realizing it!

So on this day of national shopping I figured I would show you where I shop for my Cousin Products:

Walmart

When I visited my local Walmart to get theses photos, I realized that the ONLY beads in the whole aisle were Cousin beads! Here's a little collage of the Cousin beads available at walmart:

 
If you've ever bought beads or findings from Walmart, there's a good chance they were Cousin beads!  I personally like to get chain and rhinestones from the Walmart line. The rhinestone chains are the CHEAPEST you will find anywhere. And they are so fun to craft with! These knock-off earrings I made used two different sizes of rhinestone:


And this knock-off chain necklace includes both rhinestones and chain from Walmart.


Michaels

Michaels also stocks an assortment of Cousin products - my favorite Cousin line they carry is the Crystazzi line! So many crystals and pearls available to make something glamorous.


This elegant pearl necklace I made was with all Crystazzi pearls.


A.C. Moore

A.C. Moore carries a TON of Cousin products. They have a great assorment of Cousin's Jewelry Basics line as seen in these photos:


Starring at that first picture for too long is enough to make your jewelry-loving eyes go cross eyed huh??? There is an AC Moore only about 10 minutes from my house in the same shopping center as my grocery store so if I ever need some jewelry supplies quick, this is where I head too!
 
AC Moore has a great selection of charms from Cousin, like the charms I used in this necklace!
 
 
Prima Bead
 
If you would rather do your bead shopping online, you can find many of Cousin's products on their retail website Prima Bead.The BEST thing about buying online from Prima Bead is that there is FREE SHIPPING! I hate paying shipping on beads, so now you can shop away and not feel guilty....about having to pay shipping at least :)
 
Here are some necklaces I made with supplies from Prima Bead:


So maybe after seeing some of these photos you might have realized you've bought Cousin products without even realizing it! I love Cousin beads because they are affordable and easy to find - so many different retailers offer them!

Temptu Airbrush Makeup Kit Review and GIVEAWAY!

http://bit.ly/TemptuSE

I have such a COOL product to review and giveaway today!!!!

When I first heard I was going to get to review airbrush makeup kits I was a little intimated.  Sure, I wear make-up every day but I kind of just stick to the basics. But when I first got my Temptu system in the mail, I got pretty excited to try something new. 

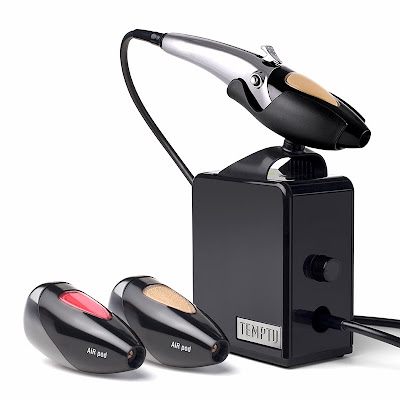
I got my Temptu airbrush set-up very easily, doesn't it look so snazzy? It should look professional, the Temptu system was developed by professional makeup artists. This system is the first easy-to-use, professional quality, home airbrush makeup system. Now everyone can pretend they have their own personal make-up artist by using Temptu makeup!

On the left of this photo is Temptu's patented AIRpod makeup. The largest pod is Temptu foundation, then next is blush and then a highlighter. On the right is the air gun that the Temptu spray makeup snaps into.

Want to know something pretty awesome? Tempu is actually the go-to makeup for tons of celebs and big-names: Carrie Underwood, Katy Perry, Beyonce, Scarlett Johansson Nicole Kidman, and even on TV sets of shows like Mad Men and Dancing with the Stars and on the runway for designers like Prada, Christian Dior and BCBG Max Azira.

Heck, if it's good enough for Carrie Underwood I'm totally giving it a try!!

I watched a short tutorial on how to apply, and then dove in.  It was so much easier than I expected!
I thought that the spray on make-up would come out very heavy,  but it was just the opposite.  You control with the trigger how much foundation sprays, and so I did multiple light mistings to get a flawless look.

Here's a progression of how I got my look:
First photo is of me sans makeup, second is after I finished applying foundation (it looks a little orange in the photo but that's due to the lighting), and the third photo is my finished look with the spray on blush, highlighter, and then also after applying eye shadow and lip gloss.

Let's blow this up a little....
Me in all my splotchy shiny glory...

And me after I used Temptu!

I have to say, I was actually REALLY impressed with the system.  It was so much easier to use than I was expecting, and it really gave me great coverage! The makeup gave me a great flawless look, was not heavy to wear, and lasted all day long!

So many times I love my look when I walk out the door in the morning and then I catch a glimpse of myself at 3:30 in the afternoon after a good couple hours of work and my foundation is shot. I put this makeup on at about 10AM on a Saturday and when I got home at 11PM after hanging out with friends it still looked just as good.

Temptu Airbrush Makeup Kits start at $149. BUT I have a SUPER RARE promo code to share with you guys! Seriously, these things don't go on sale! You can now get 20% off the Temptu system with code 876PL9TW.

http://bit.ly/TemptuSE


You want to know what's even better than 20% off? FREE!!!!! And I have a FREE airbrush kit to giveaway to one of you lucky ducks! Enter in the widget below!


Best of luck on the giveaway, make sure you follow Temptu on facebook, twitter, and instagram!


http://bit.ly./TemptuSE

Your Whims Wednesday #139 {And Features}

Time for another Your Whims Wednesday Party!

Your Whims Wednesday

 Here are some of my favorites from last week:

Fall Leaf Tree by Made in a Day
Fall Leaf Tree Madeinaday.com

Book Page Banner by Atkinson Drive
Holiday Book Page Banner | Atkinson Drive

Joy Cabinet Sign by Chapter 37
how to make wood letter signs from old cabinet doors by chapter37

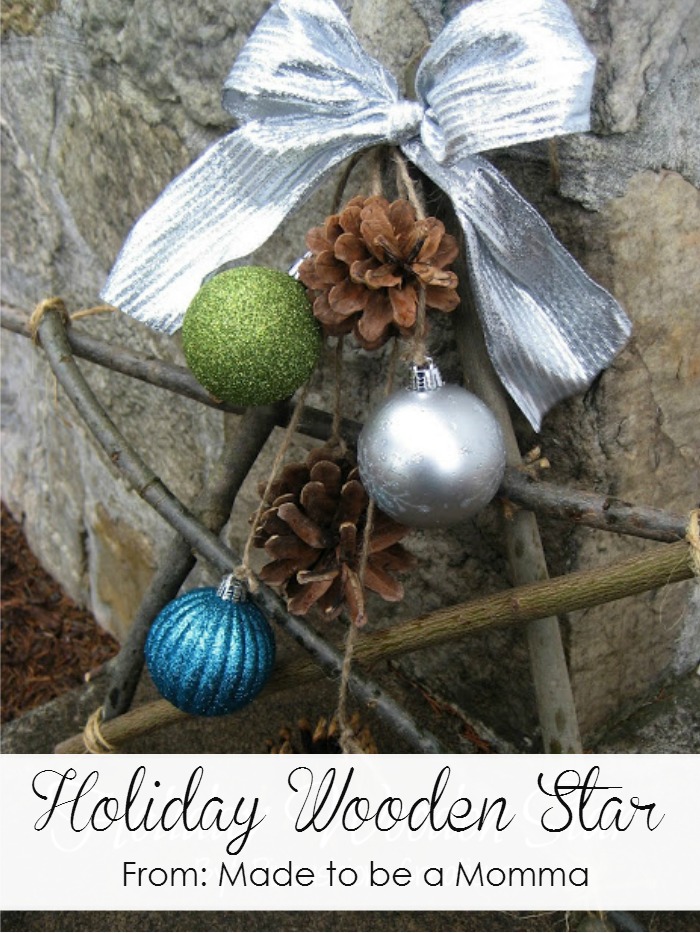
Holiday Wooden Star by Made to be a Momma
Holiday Wooden Star

Thanks to all who linked up! Grab a button if you were featured :)
 
Featured on My Girlish Whims
 
Now... onto this weeks party!

I show off my girlish whims weekly on my blog, and now I want to see yours with 
Your Whims Wednesday!

Guidlines:
1. Link up as many projects as you would like: as long as it is one of your girly ways, you can link it! I'd love to see crafts, recipes, style posts, etc. Anything and everything feminine :)
2.Please add my button (code at the top of this post) to either your blog post or somewhere on your blog. 
3. Take a quick moment to comment on at least one other entry. We we all love comments!! 
4.I'd love if you would follow me as well :)

Thanksgiving Season Decorated Shelves

Well, since Thanksgiving is just a few days away I thought it was finally time to share my autumn shelf decor! Gotta document this before the weekend when everything gets switched out for Christmas decor!!

I have floating shelves in my family room that I love decorating for the different seasons and holidays.  You can see my fall shelves from last year HERE. I'll be honest, I'm still working on refining my decorating skills.  I'll always be a jewelry maker/crafter first - but I'm trying to get decent in home decor as well :) I like this year's arrangement much better than last year. I think adding more height and variation in my decor helped out this year!


Here's a close up on all the shelves:
The window is from a local shop, pumpkins from the dollar store (two of them I spray painted), votive holders are from target, I made the fall leaf wreath and give thanks bunting


On this shelf: I got the little copper pitcher from a thrift store, the mini pumpkin was a gift, the large pumpkin is from Ross, and the charger was thrifted and the happy harvest bunting was a DIY

And on my last mini shelf I have two mini pumpkins from a local farm, the vase/candle thing is from Ross, and the little pumpkin arrangement is from a local shop.

I had so much fun swapping out my "neutral" decor for the fall decorations - a sign that it's the holiday season with lots more decorating to come!!

DIY Beaded Dangle Necklace

One of the best things about being able to make your own jewelry is being able to easily make a necklace to go with a specific outfit. That's exactly where this next necklace came from!


I wanted a cute, coral/peach necklace to go with a new polka-dotted top I bought from Target.  This beaded dangle necklace was the perfect fit!

This is really where being a bead hoarder comes in handy...a nice large selection of bead colors to pick from. I had the perfect selection of peach beads lefts over from this necklace to make a different bib style necklace to go with my new shirt!
 PS: Like my make-up?? Stay tuned for more info and a giveaway later this week!!!

Here's how to make your own DIY necklace!

 Supplies:
Needed to make this necklace: two different types of peach stone beads, pink crystal rondelles, round stone beads, head pins, eye pins, crimp beads, beading wire, chain.

Steps:
First step is to make the main dangles of the necklace.  String your larger stone beads onto head pins

Bend the head pin 90 degrees above the bead with needle nose pliers. Cut off all but about a half inch tail with wire cutters.  Curl the tail into a loop using round nose pliers. 

Attach an eye pin onto the head pin using pliers.  Add on a crystal bead, then form another loop and add on a longer eye pin.

String on your smaller stone bead and then form another loop on the other end of the eye pin

Next, cut a length of beading wire sufficient for a necklace length.  String on one of the beaded dangles.

String on three round stone beads on either side, then another dangle. Continue until all dangles are strung. 

Fill up the rest of the beading wire with round beads and attach a clasp using a crimp bead.

Tada!

I just love how this one turned out.  I tend to always lean towards incorporating chain somewhere in a necklace, and so I was happy to switch things up and use only beads in this necklace.

Cheese! Here's to pretty necklaces and pink polka dots :)

I'm linking up with these parties:
Thursdays: Catch a Glimpse

Your Whims Wednesday #138 {And Features}

Time for another Your Whims Wednesday Party!

Your Whims Wednesday

 Here are some of my favorites from last week:

Chain Reaction Necklace by the Jewelry Making Journal
Chain Reaction Necklace - tutorial by Rena Klingenberg

Love is the Key Sign by Avocado Grove


Crochet Boots by Crochet Dreamz


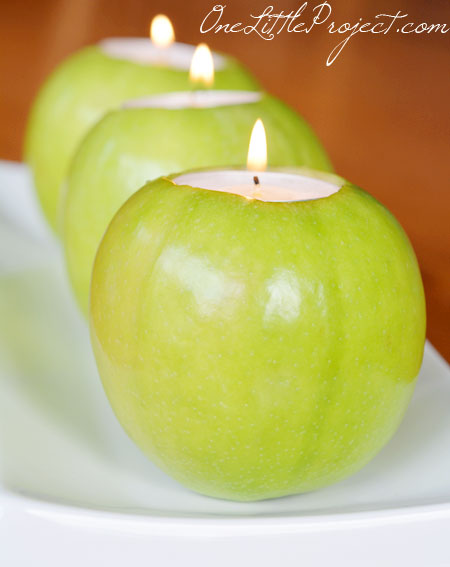
Fresh Apple Candles by One Little Project
Here's an easy tutorial with loads of pictures for how to make apple tea lights.These are such a gorgeous idea to decorate an autumn table!

Peacock Earrings by Honesty's Protegee
Peacock Earrings

Thanks to all who linked up! Grab a button if you were featured :)
 
Featured on My Girlish Whims
 
Now... onto this weeks party!

I show off my girlish whims weekly on my blog, and now I want to see yours with 
Your Whims Wednesday!

Guidlines:
1. Link up as many projects as you would like: as long as it is one of your girly ways, you can link it! I'd love to see crafts, recipes, style posts, etc. Anything and everything feminine :)
2.Please add my button (code at the top of this post) to either your blog post or somewhere on your blog. 
3. Take a quick moment to comment on at least one other entry. We we all love comments!! 
4.I'd love if you would follow me as well :)